MediaArtTutorials
| ← MEDIA 2DF3 | Project 1 Overview |
P1 – In-Class Work I: Brainstorm, Sketch & Laser-Cut Prep
Group Project – 3 to 4 students per group
⚠️ You must complete the online Thode Makerspace training modules on Avenue to Learn and the in-person training before this session.
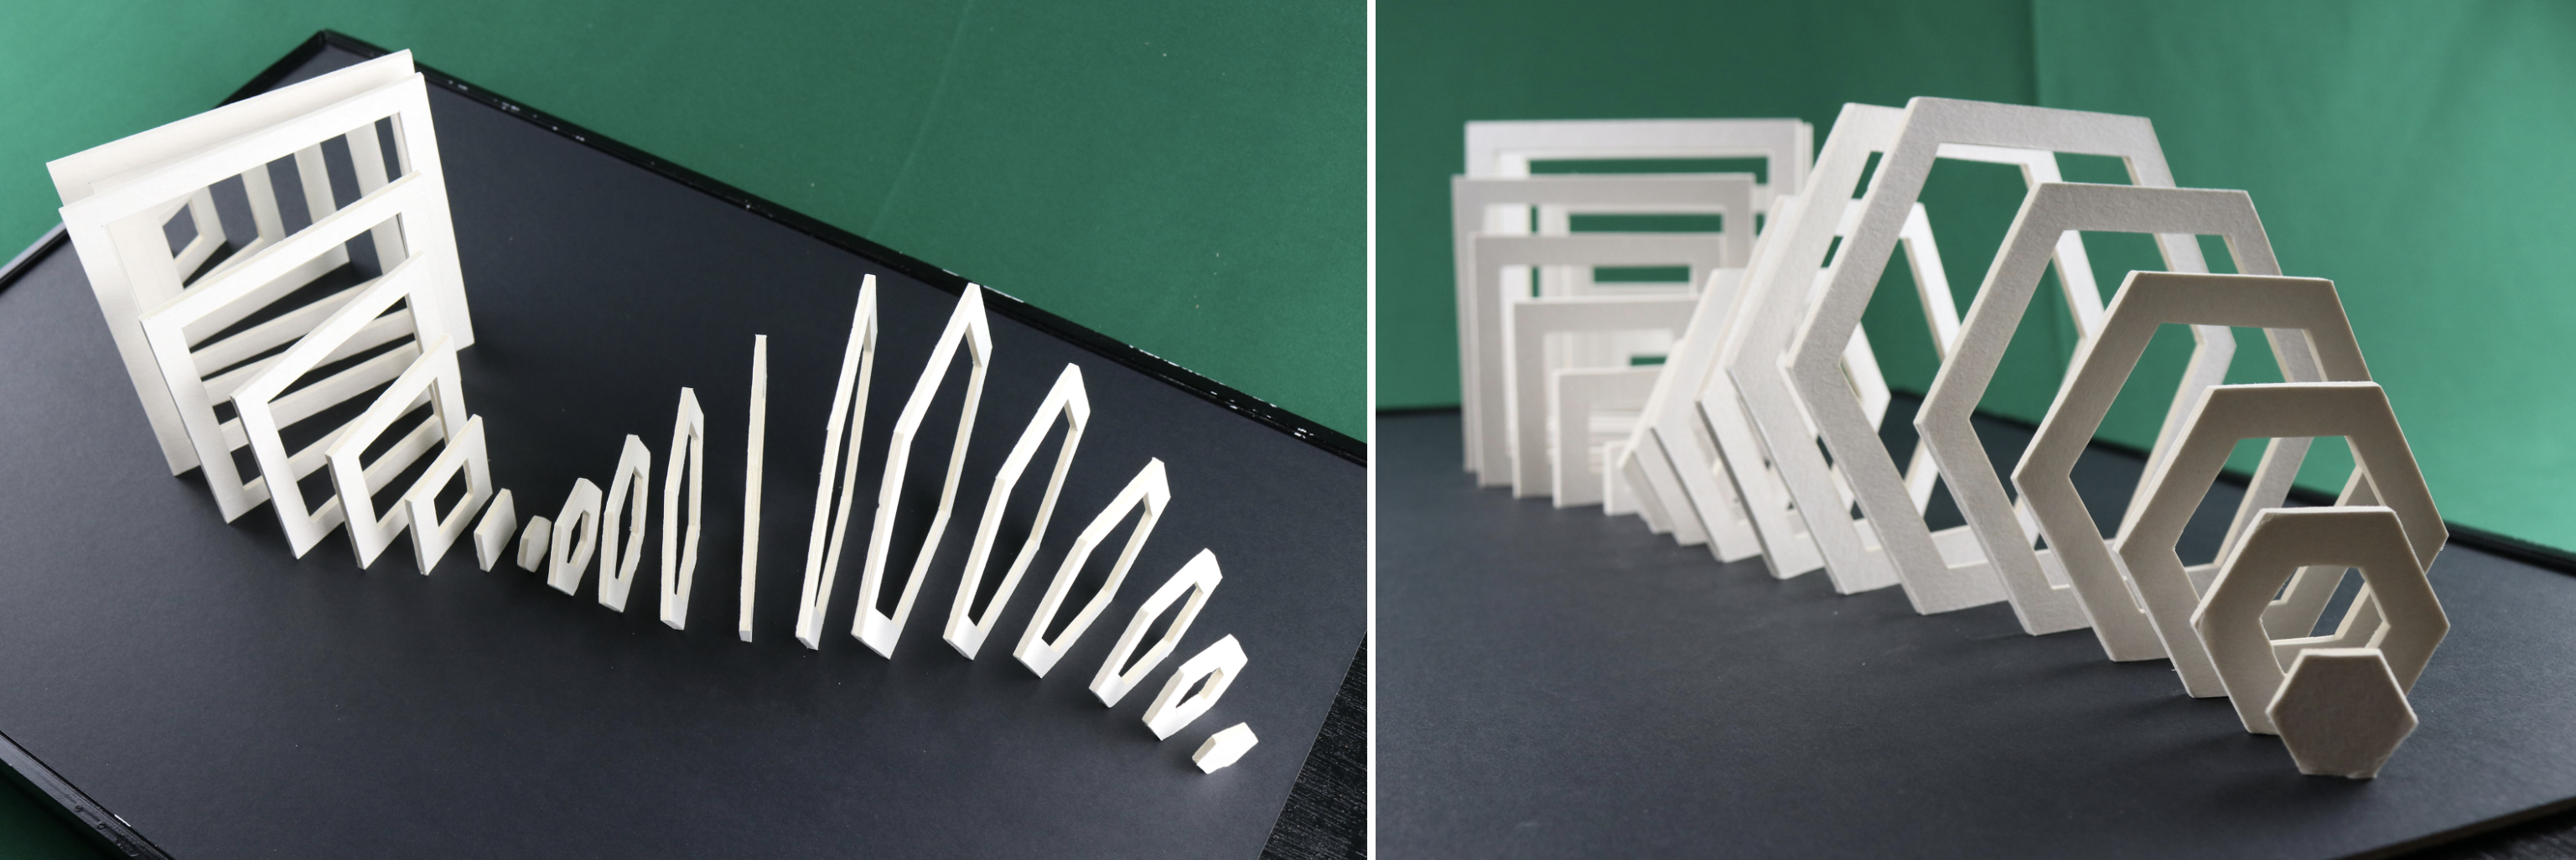
In this session, your group will collaboratively plan and prototype a three-dimensional composition built from a repetition of two-dimensional planes, using sketches and digital tools. You will explore form, repetition, and spatial relationships, and prepare your designs for laser-cutting using Inkscape — the software required by the Thode Makerspace.
[30 min] Brainstorming & Concept Sketching
Work together to generate ideas for your composition, inspired by Wong’s Elements of Two-Dimensional Design and sculptural principles of form through repetition.
Create a Brainstorming Document that includes both written notes and sketches.
Use it to record your group’s concepts, visual ideas, and initial layout planning.
Each team member should actively contribute written ideas and at least one quick sketch.
Your group sketch and notes must:
- Include 20–30 individual planes arranged over a defined base.
You will be provided with birchwood plates (24 × 12 in, 0.3 in thick) –charged to your McMaster account.
- Apply at least three of the following design principles:
Form, Repetition, Structure, Similarity, Gradation, Radiation, Anomaly, Contrast, Concentration.For reference, check: Elements of Design Cheatsheet
- Clearly define the shape, dimensions (width and height), and spacing of each plane.
- Incorporate variation in height, depth, and/or angle.
- Propose a colour scheme based on gradation (see below).
- Identify potential connectors or supports between planes.
- You must consider the shape, size, and color of the base.
Color Scheme - Gradient Strategy:
- Assign each shape a single solid colour, arranged to produce a visible gradient transition
- You may design:
- Linear gradients (e.g., red to blue)
- Multi-step gradients (e.g., rainbow blends)
- Use HSV (Hue, Saturation, Value) to guide your colour shifts:
- Hue → controls colour change
- Saturation → intensity of each step
- Value → brightness and darkness across the range
✏️ Your Brainstorming Document should combine hand sketches, digital mockups, and written notes that explain your visual decisions. You will submit this document at the end of class.
Illustrator → Inkscape Workflow
Use Adobe Illustrator and Inkscape to transform your sketches into vector-ready files for laser-cutting.
What is Inkscape?
Inkscape is a free, open-source vector graphics editor similar to Adobe Illustrator. It allows you to design using precise paths, making it ideal for digital fabrication.
While we are using Inkscape because it is required by the Thode Makerspace, learning to adapt to different software platforms is a valuable skill for any media artist. Being proficient across both proprietary and open-source tools strengthens your ability to work in a variety of production environments, from galleries to labs to community-based studios.
Adobe Illustrator
Use the previous tutorials + this new tutorial to complete this project.
[20 min] Individual Exercise – Illustrator → Inkscape Workflow Practice
Before starting the group prototype, each student will complete a short individual exercise to practice the laser-cut file workflow.
⚠️ Before leaving class, you must show your test file to the instructor to receive comments and troubleshooting feedback.
Follow this step-by-step tutorial:
Overview
- Open a new Adobe Illustrator file:
- Size: Letter
- Color Mode: RGB
- Artboards: 2
- Create two simple composed vector shapes combining two shapes together using the Relationships of Form:
- Use one artboard per shape.
- Do not use fill; set the stroke to black (1 pt).
- Each must be a single closed shape — use Pathfinder to combine multiple shapes.
-
Export each shape as an
.SVGfile. - Open a new Inkscape file:
- Units: Inches
- Page Size: 24 × 12 in
- Color Mode: RGB
- Artboards: 1
- Import the SVGs into Inkscape and prepare them for laser-cutting:
- Remove all fills.
- Set the stroke color to Red (R=255, G=0, B=0).
- Opacity should be 100%.
- Set stroke width = 0.001 in (or 0.10 px if your version uses pixels).
-
Align both shapes within the 24 × 12 in canvas.
-
Save your Inkscape file as SVG. No unique name required.
- Add your name to the waiting list for the professor to check your file before you leave class.
No submission is required for this activity.
⚠️ Before leaving class, you must show your test file to the instructor to receive comments and troubleshooting feedback.
This ensures your workflow and file setup are correct before starting the group design.
[45–60 min] Group Work – Vector File Production for Laser-Cutting
Once everyone has completed the individual practice, your group will begin preparing the actual vector files for your collaborative design.
Group Tasks
- Divide shapes among members so each student is responsible for a section of the design.
- After dividing the shapes, each group member should create their shapes in a similar document as follows:
- Open a new Adobe Illustrator file:
- Size: Letter
- Color Mode: RGB
- Artboards: Choose the number of shapes you have
- Create your vector shapes (e.g., square, circle, or custom polygon):
- Use one artboard per shape.
- Do not use fill; set the stroke to black (1 pt).
- Each must be a single closed shape — use Pathfinder to combine multiple objects if needed.
- ⚠️ Be careful with the measurements of your shapes! Follow the width and height your group agreed on for each shape.
-
Export each shape as an
.SVGfile. - Once all members finish, import all shapes into a shared Inkscape document(s) to assemble the group’s full composition. Open a new document(s) sized 24 × 12 in and import your SVGs into Inkscape
- Each birchwood plate must be represented in a separate 24 × 12 in document.
- Carefully plan the layout and spacing to maximize use of the sheet and avoid wasted material.
- Prepare each file for laser-cutting by removing fills, setting stroke color to Red (R=255, G=0, B=0), setting Opacity=100%, and adjusting the stroke width to 0.001 in (or 0.10 px).
- Save your Inkscape files as .SVG, named as:
Group-#-Plate-1.svg,Group-#-Plate-2.svg, etc.
⚠️ The birchwood plates are 24 × 12 in — ensure your compositions fit within this limit to avoid material waste.
Double-check all measurements, spacing, and layer organization before saving.
📥 Submission
- Group brainstorming notes and sketches
- Naming Protocol:
Group-#-Notes.pdf
- Naming Protocol:
- Lasser-Cutting Prep Files
- File naming:
Group-#-Plate-1.svg,Group-#-Plate-2.svg, etc.- Double-check all measurements, spacing, and layer organization.
- File naming:
Review the required materials list for Part 2 under Project 1 Overview and bring them to the next class.
📌 Failure to follow document setup or naming instructions may result in a grade deduction.