MEDIAART 2DF3

Composition Techniques I – Part 2

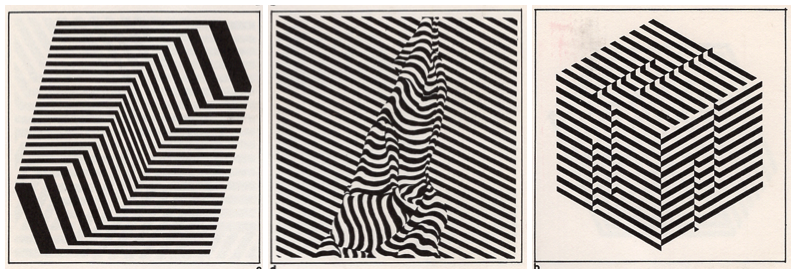
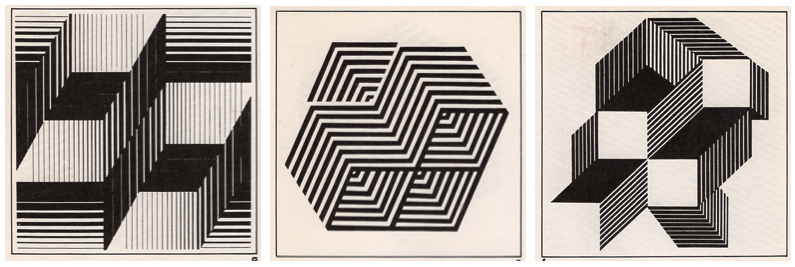
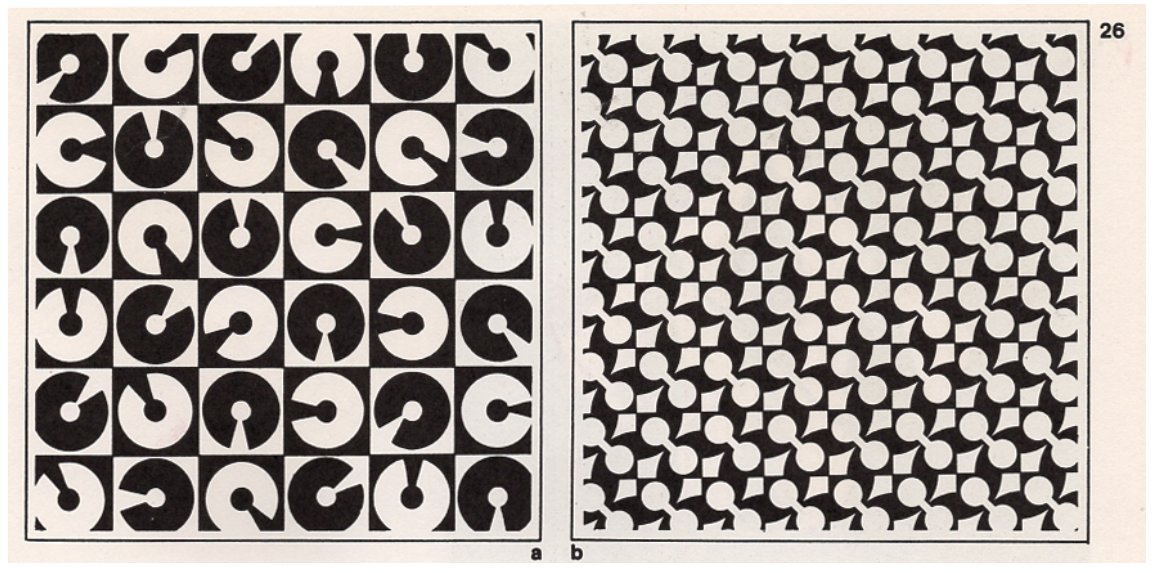
Examples from previous Composition Techniques I activities

Goal

Design and create three black-and-white digital compositions by building, repeating, and systematically altering a super-unit through more complex relationships of form, surface, contrast, and space.

Each composition must combine:

Activity overview

Accessibility and learning support

Complete the activity in four stages

Complete the following stages in order.

Stage 1: Review the concepts Review the assigned relationships of form, design principles, surface strategies, and spatial approaches before planning.

Principles of Two-Dimensional Design

Interrelationships of Form

Union, Subtraction, and Intersection

Each composition begins with a super-unit that clearly demonstrates one assigned relationship:

  • Union: Two or more forms merge and become one larger form. The internal boundaries between the original forms disappear.
  • Subtraction: One form removes a visible area from another, creating a new contour and an active negative space.
  • Intersection: Only the area shared by the overlapping forms remains visible.
  • Coinciding: Two forms occupy exactly the same position and overlap completely, appearing as a single form.
Super-unit versus composition
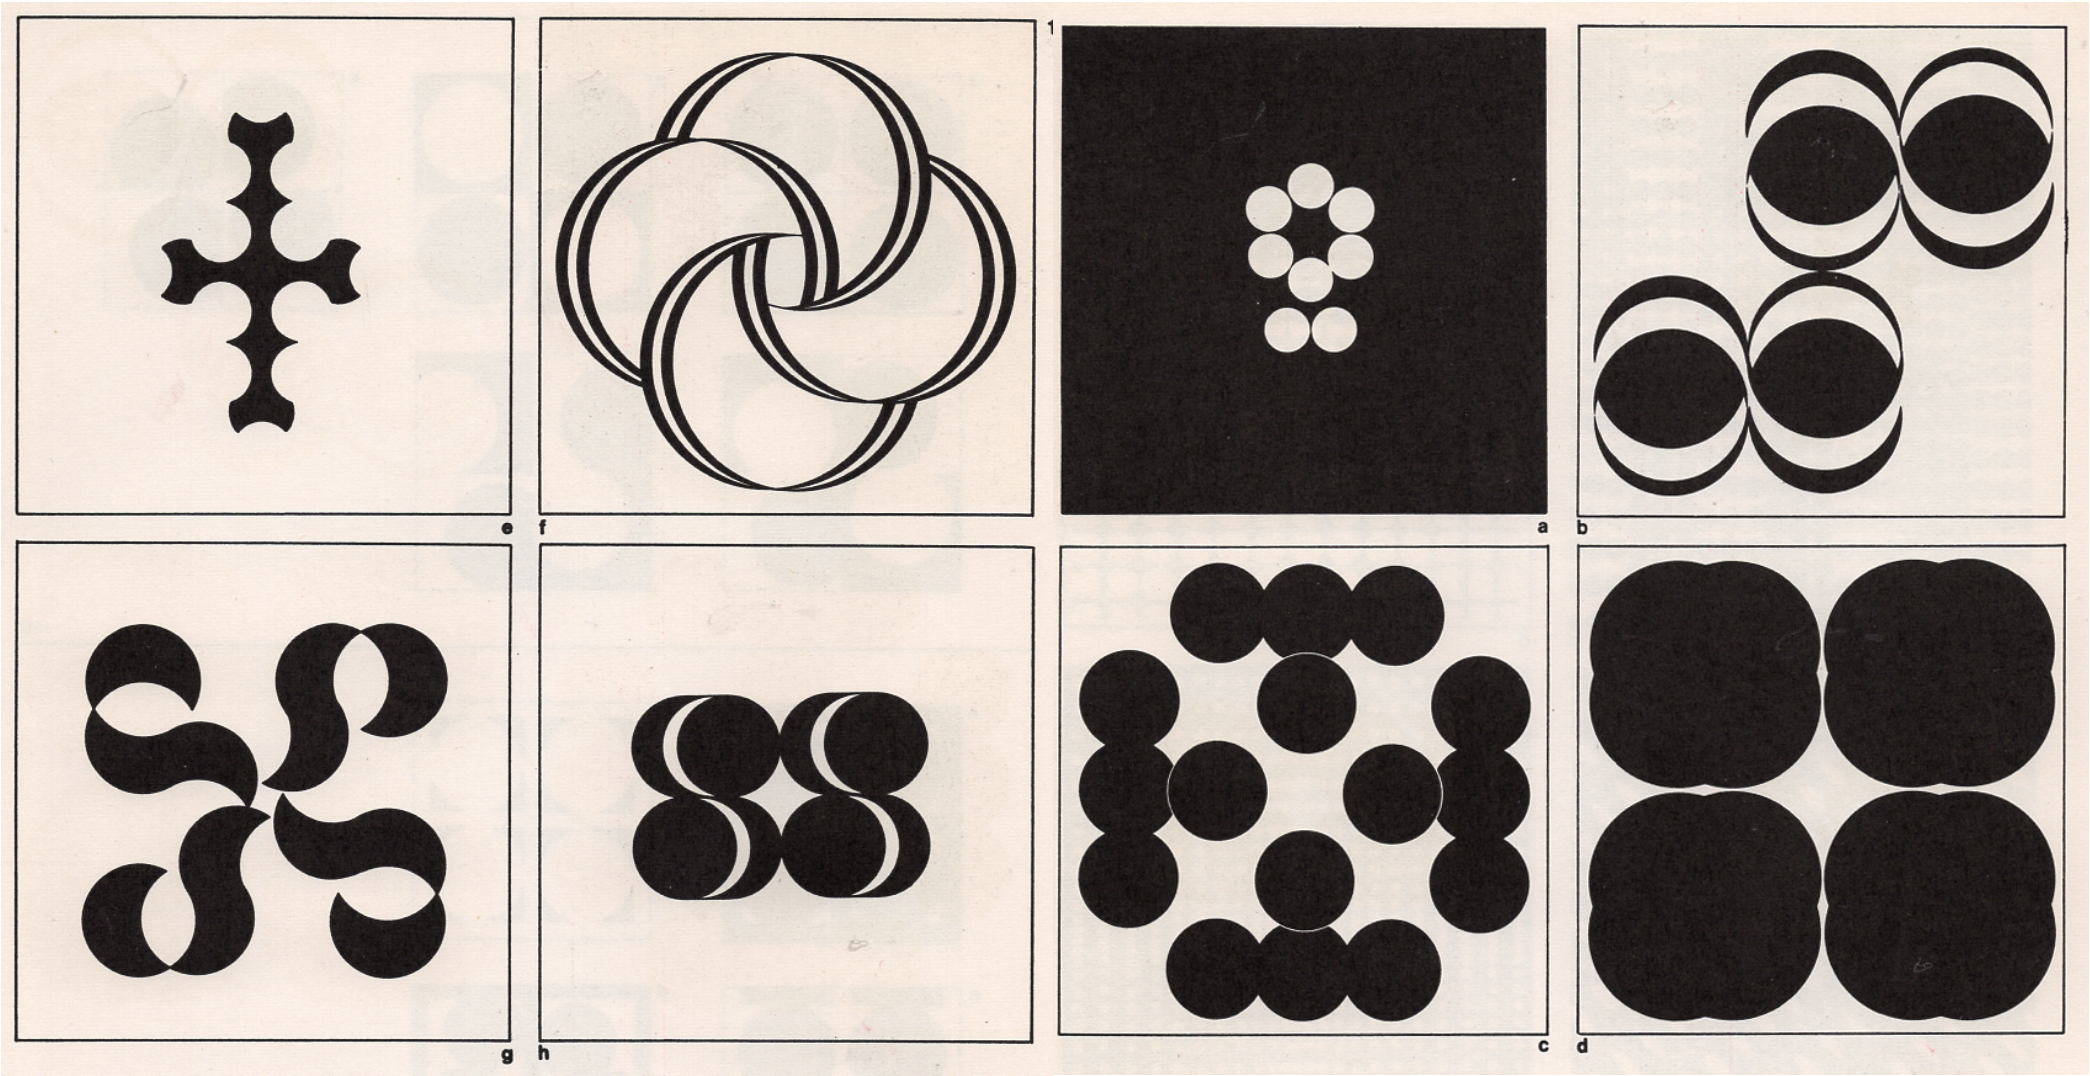
Examples of super-units

A super-unit is a small structure created by combining two or more shapes through an Interrelationship of Form.

The final composition must develop that starting structure into a larger visual system:

  1. Create one clearly resolved super-unit.
  2. Repeat the super-unit at least eight times.
  3. Alter the repeated instances in a controlled way.
  4. Organize the instances through the assigned repetition grid, grid structures, and principles.
  5. Use the complete square format, including its edges, margins, and negative spaces.

The assigned relationship inside the original super-unit must remain identifiable after the instances are repeated and altered.

Other Principles
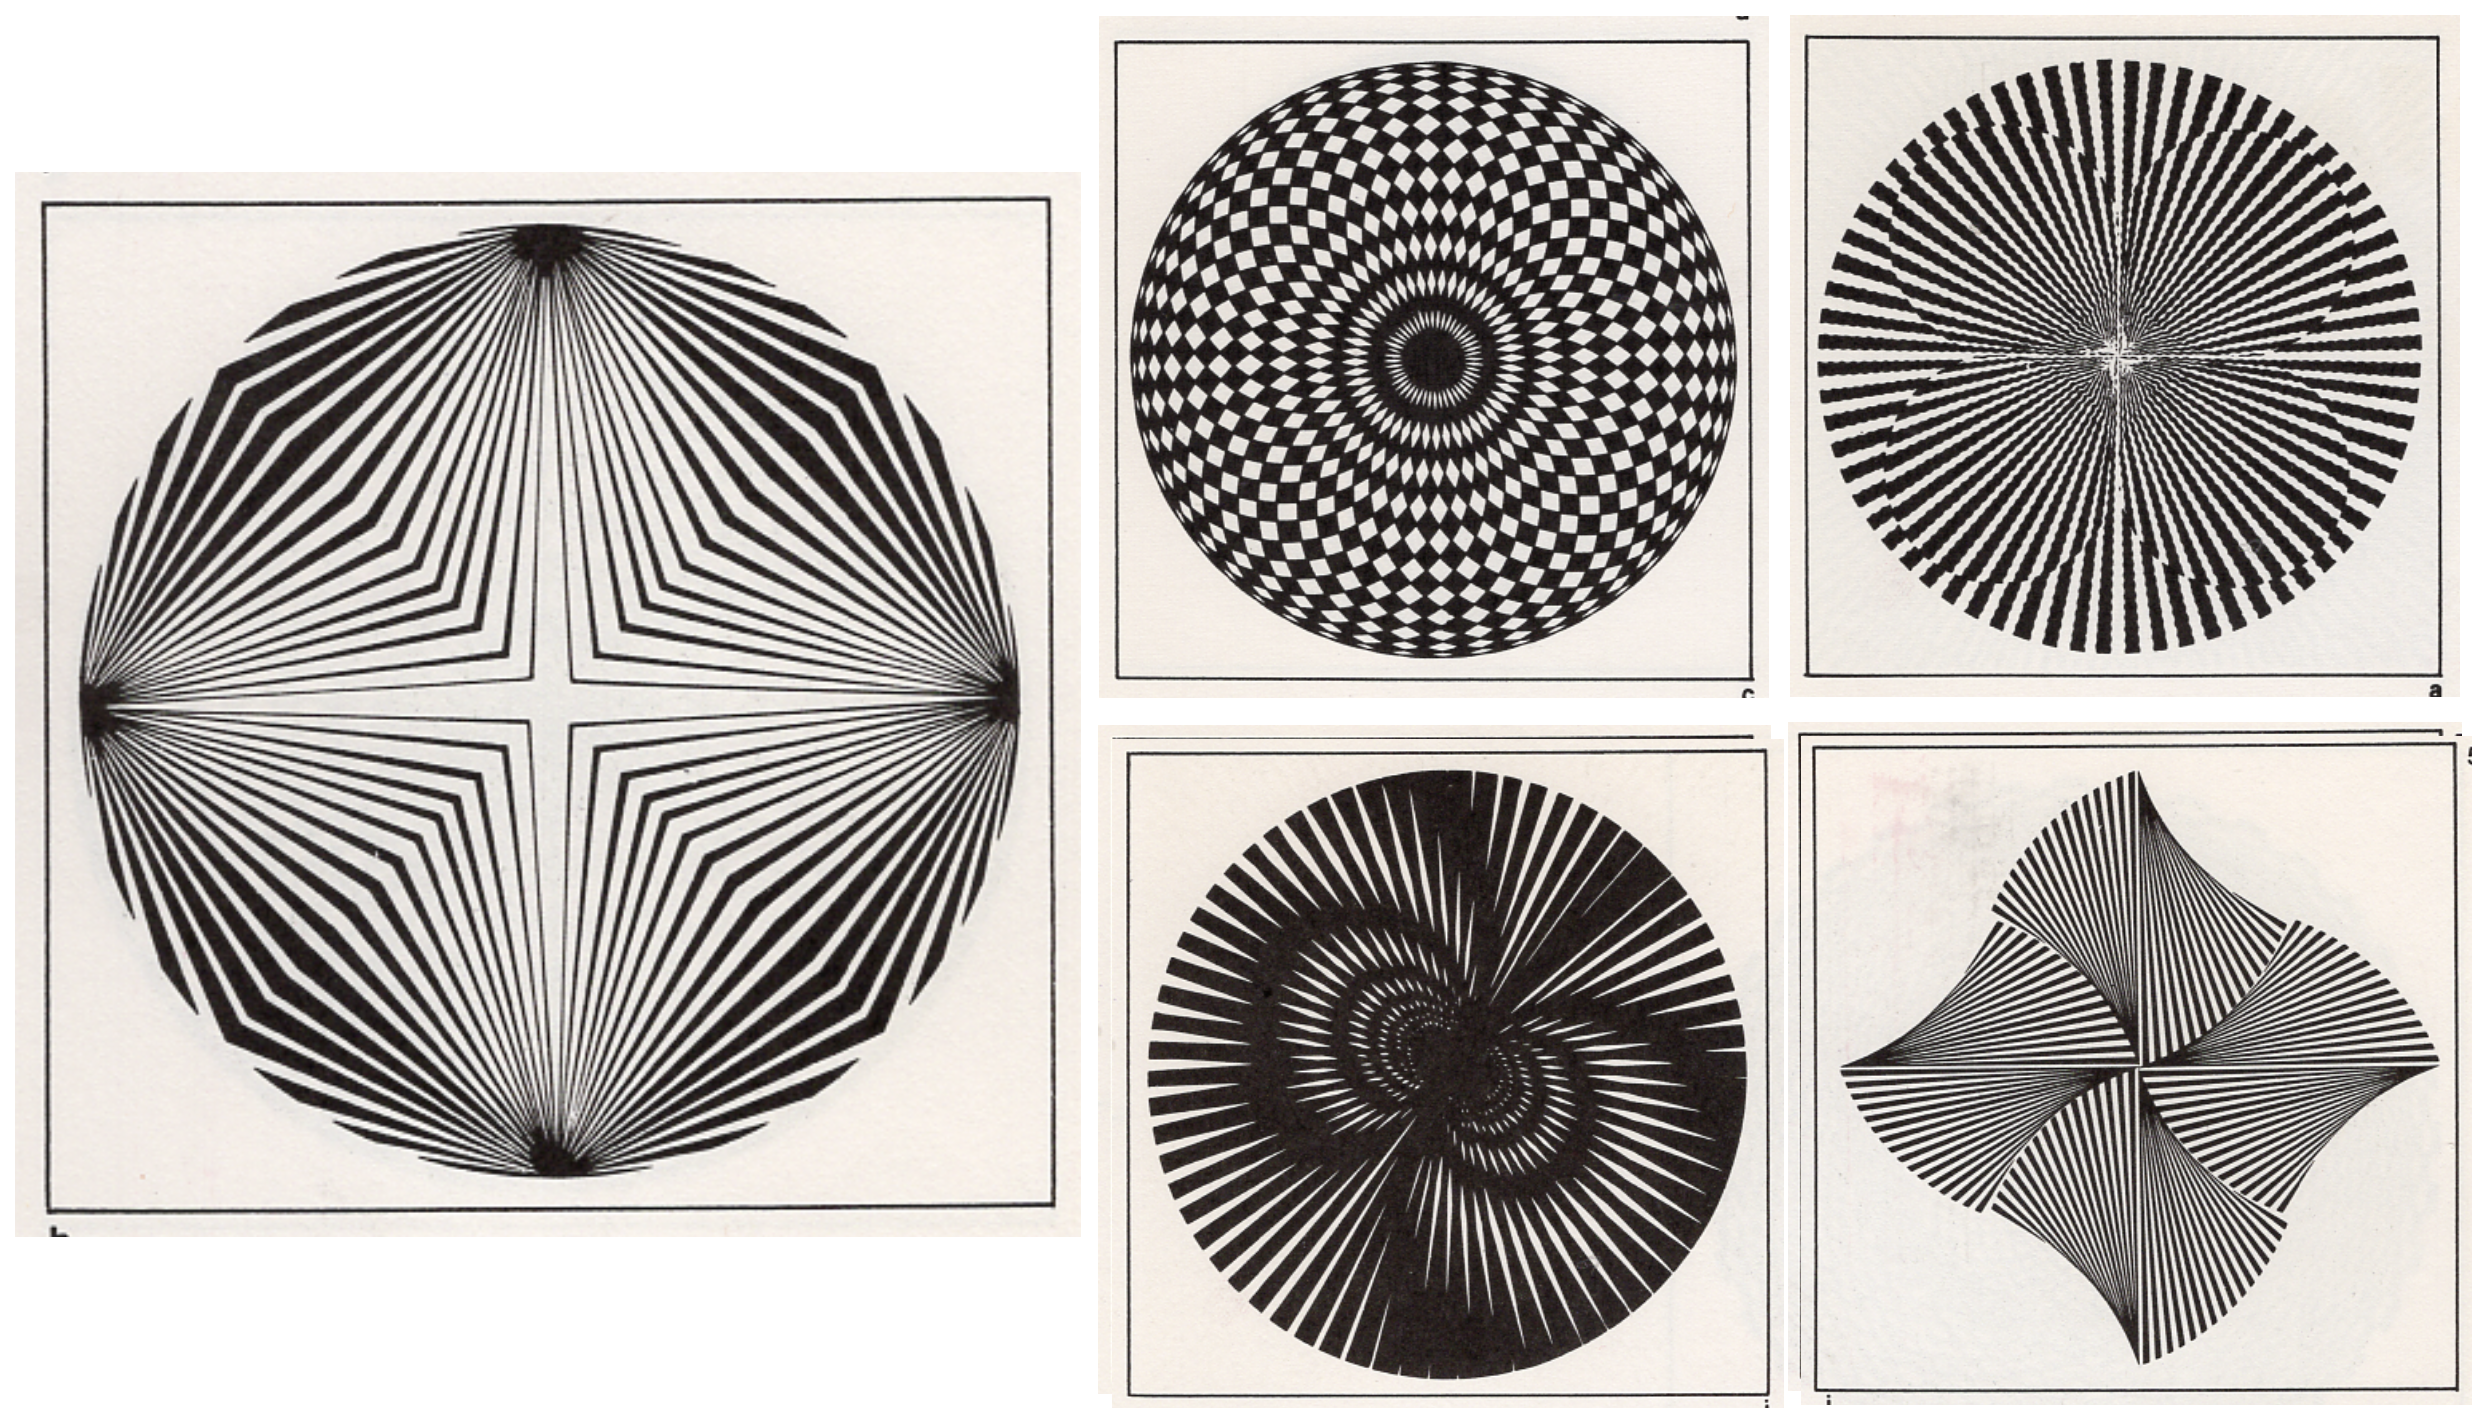
Example showing repeated forms arranged around a common centre and extending outward

Radiation

Radiation organizes repeated forms around a common centre. Changes in direction, scale, spacing, or rotation can create movement, emphasis, and a strong focal point.
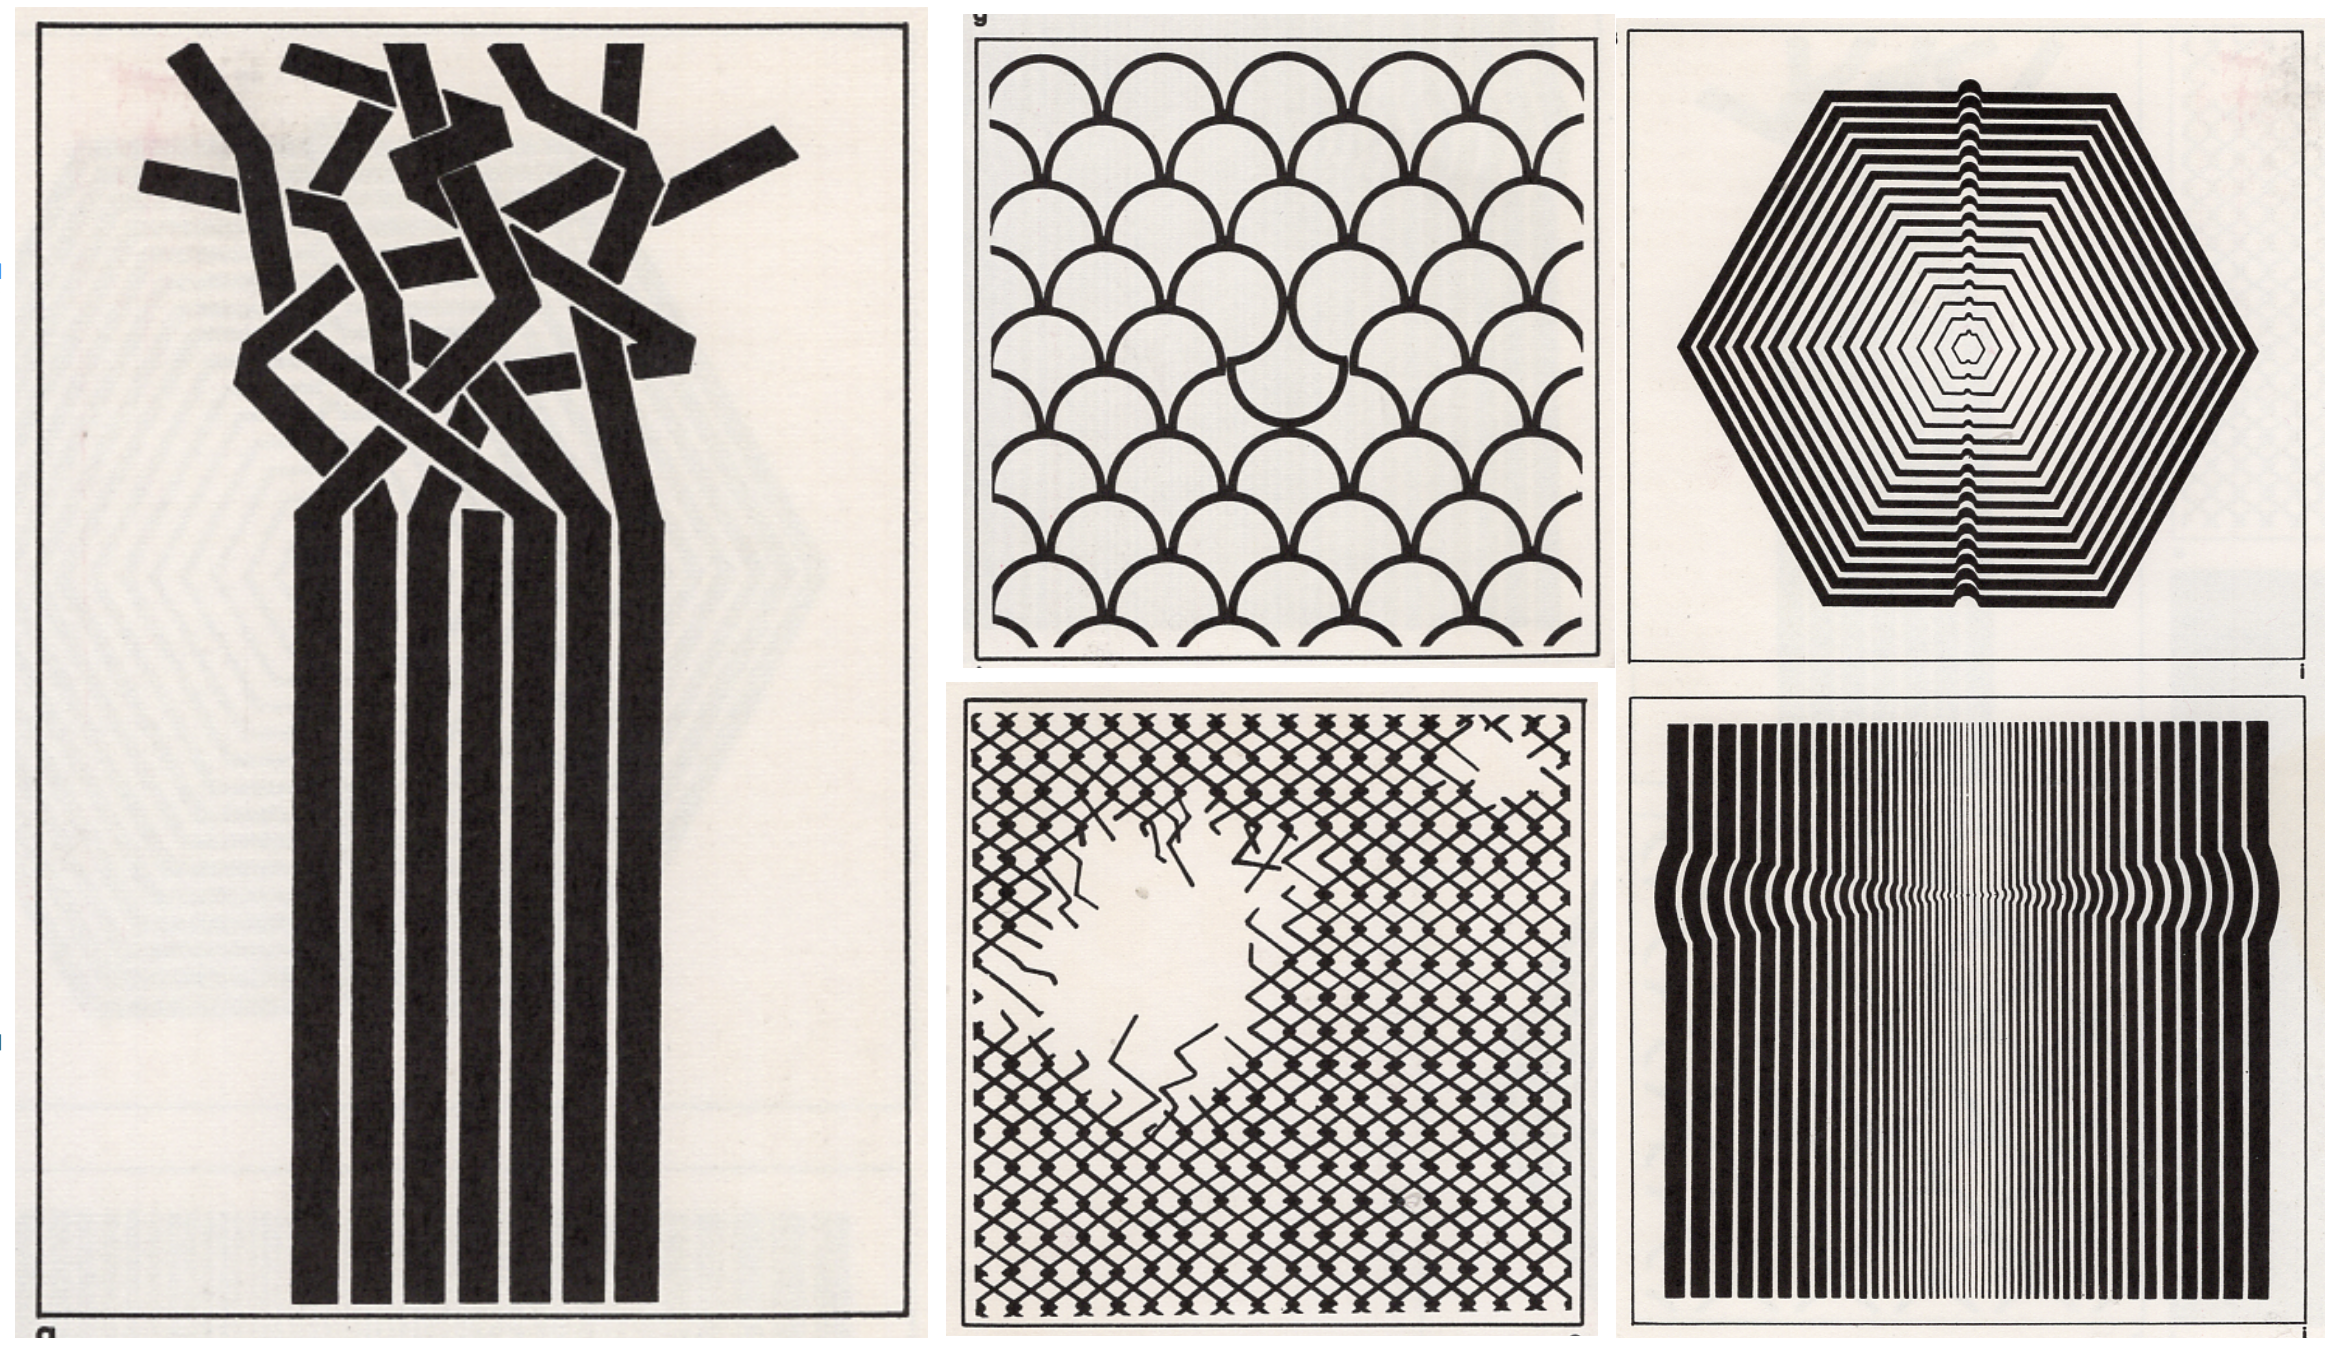
Example showing one form that differs from an otherwise consistent visual system

Anomaly

An anomaly is an intentional irregularity within an otherwise consistent system. A change in shape, size, position, direction, value, or texture can interrupt the pattern and create emphasis.
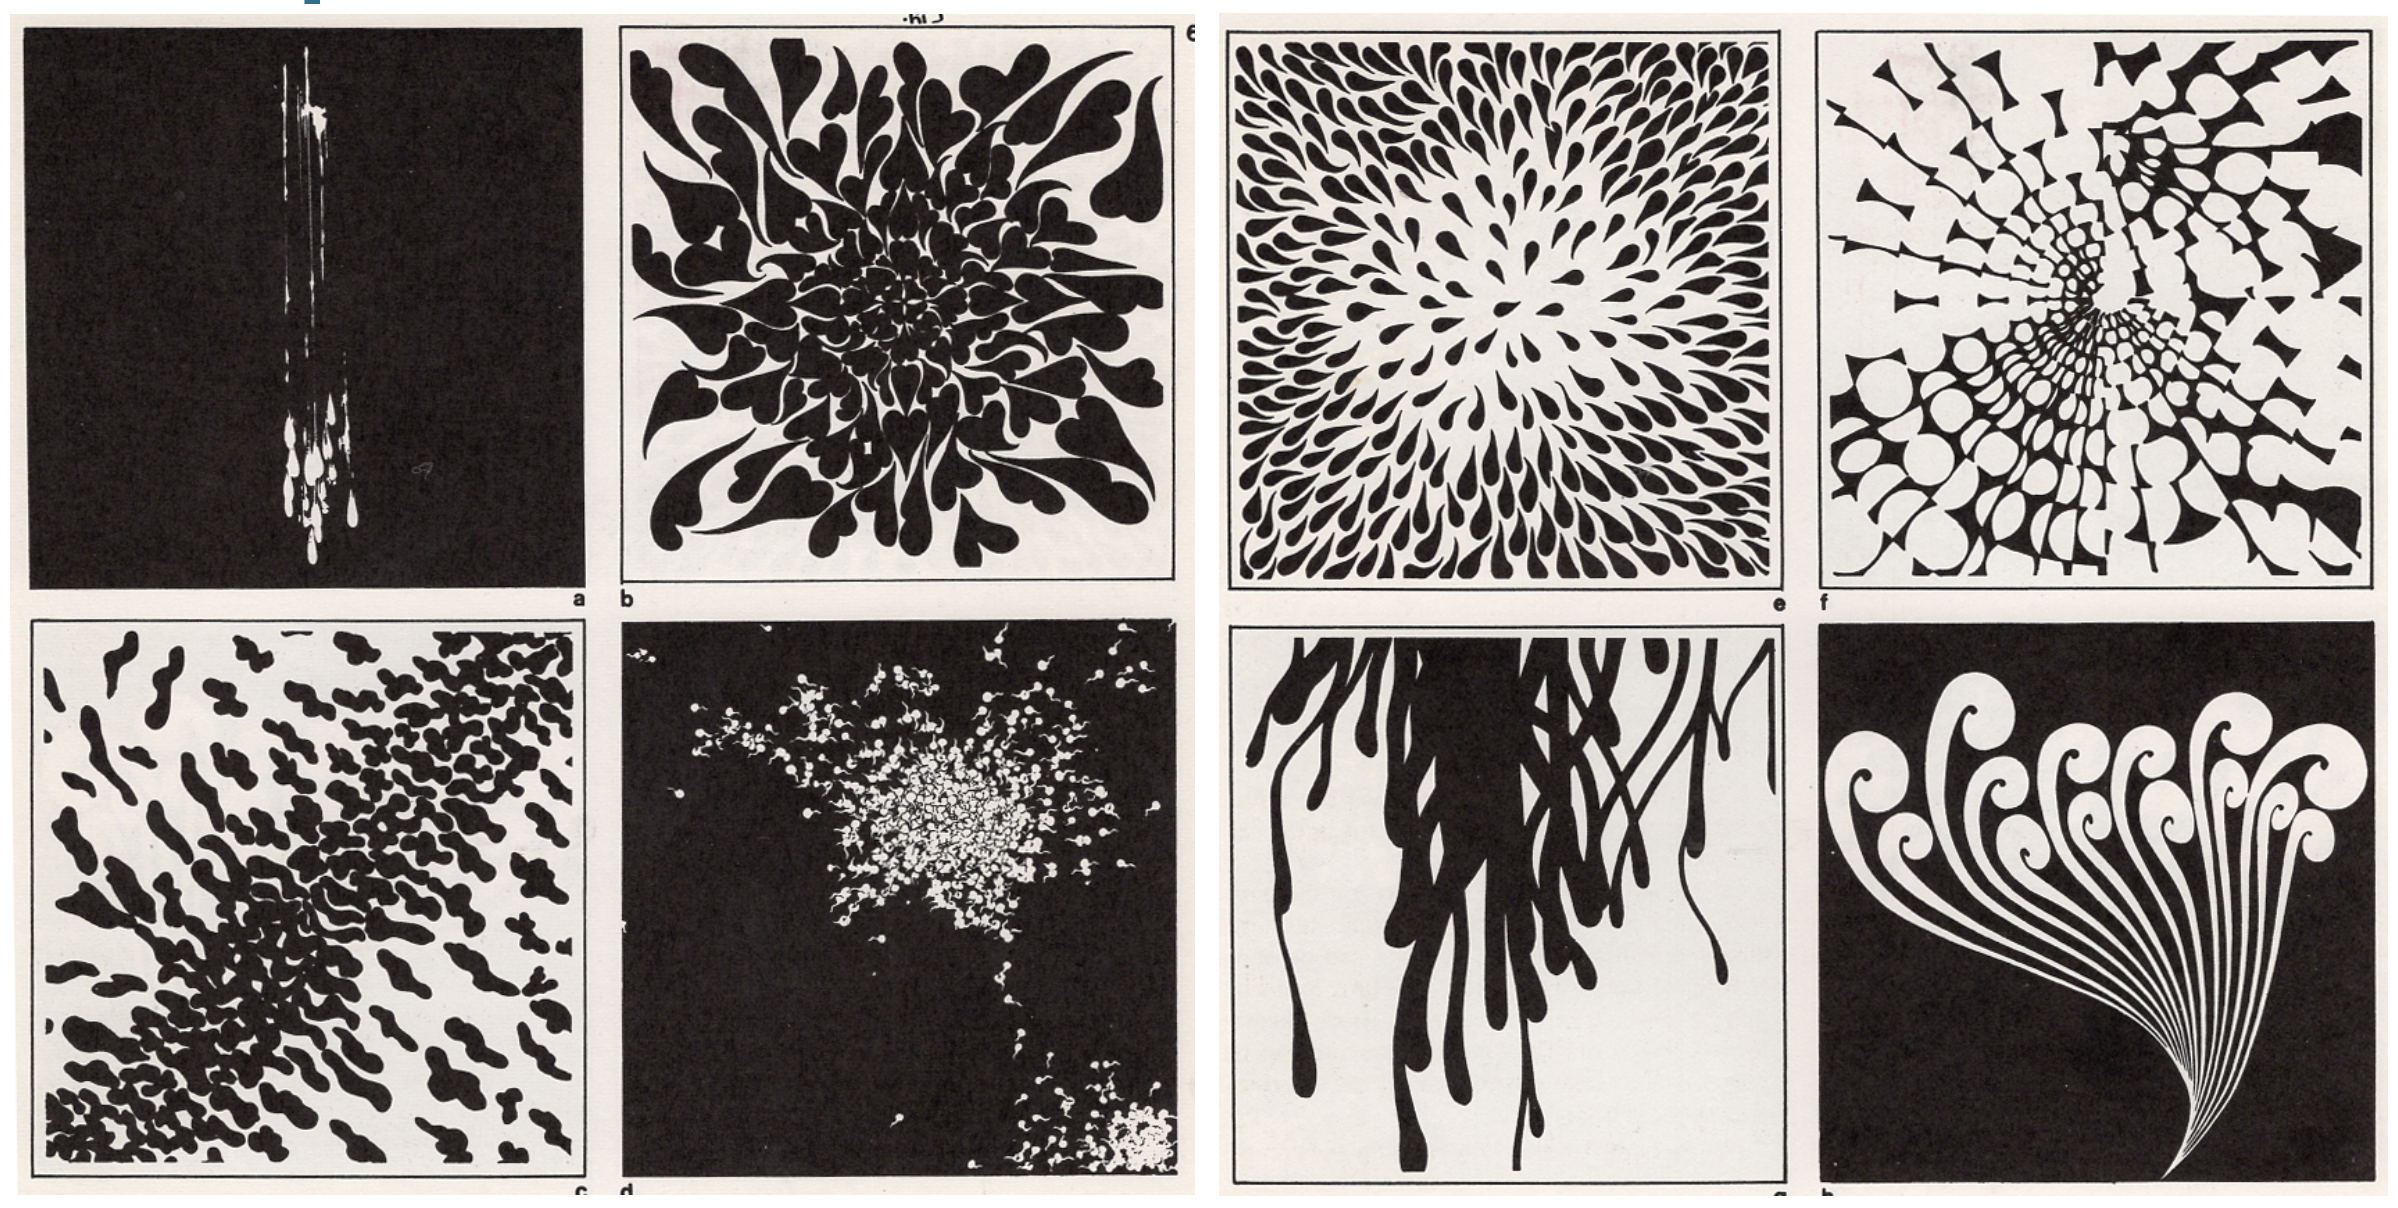
Example showing repeated forms distributed from sparse areas to densely grouped areas

Concentration

Concentration organizes forms through changes in density and distribution. Elements may gather around a point, line, area, or direction, creating dense and sparse regions within the composition.
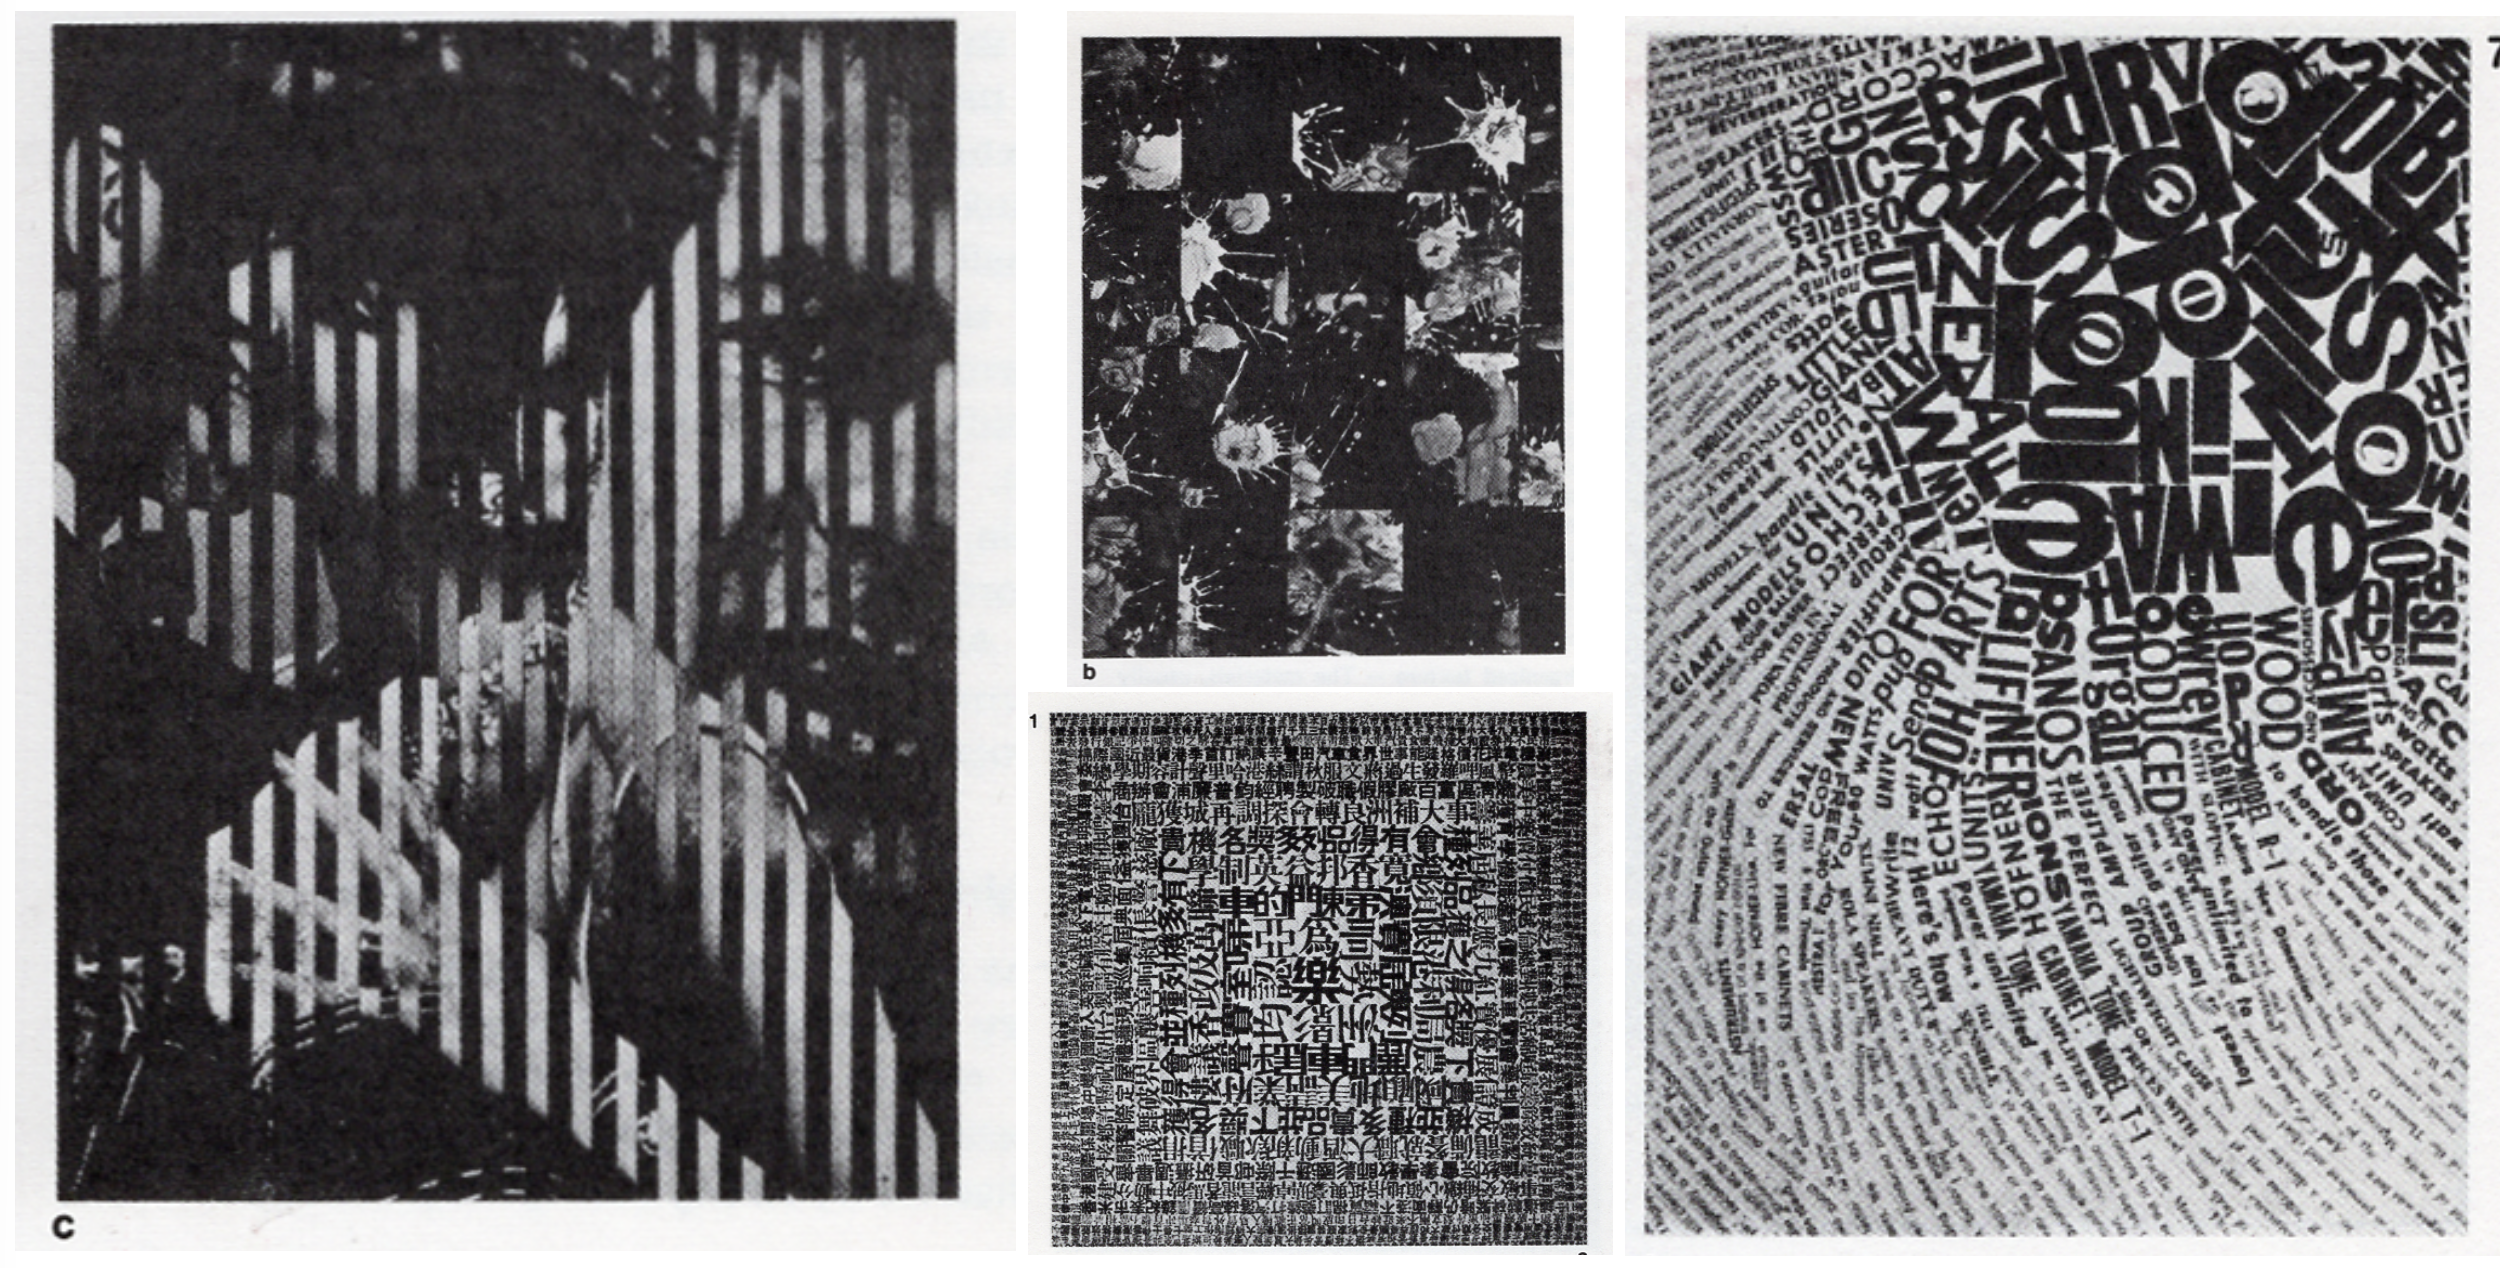
Example showing visible surface variation created through repeated marks and physical material

Texture

Texture describes the visual or physical qualities of a surface. Changes in marks, grain, density, pattern, material, and value can make a form appear smooth, rough, soft, irregular, flat, or dimensional.
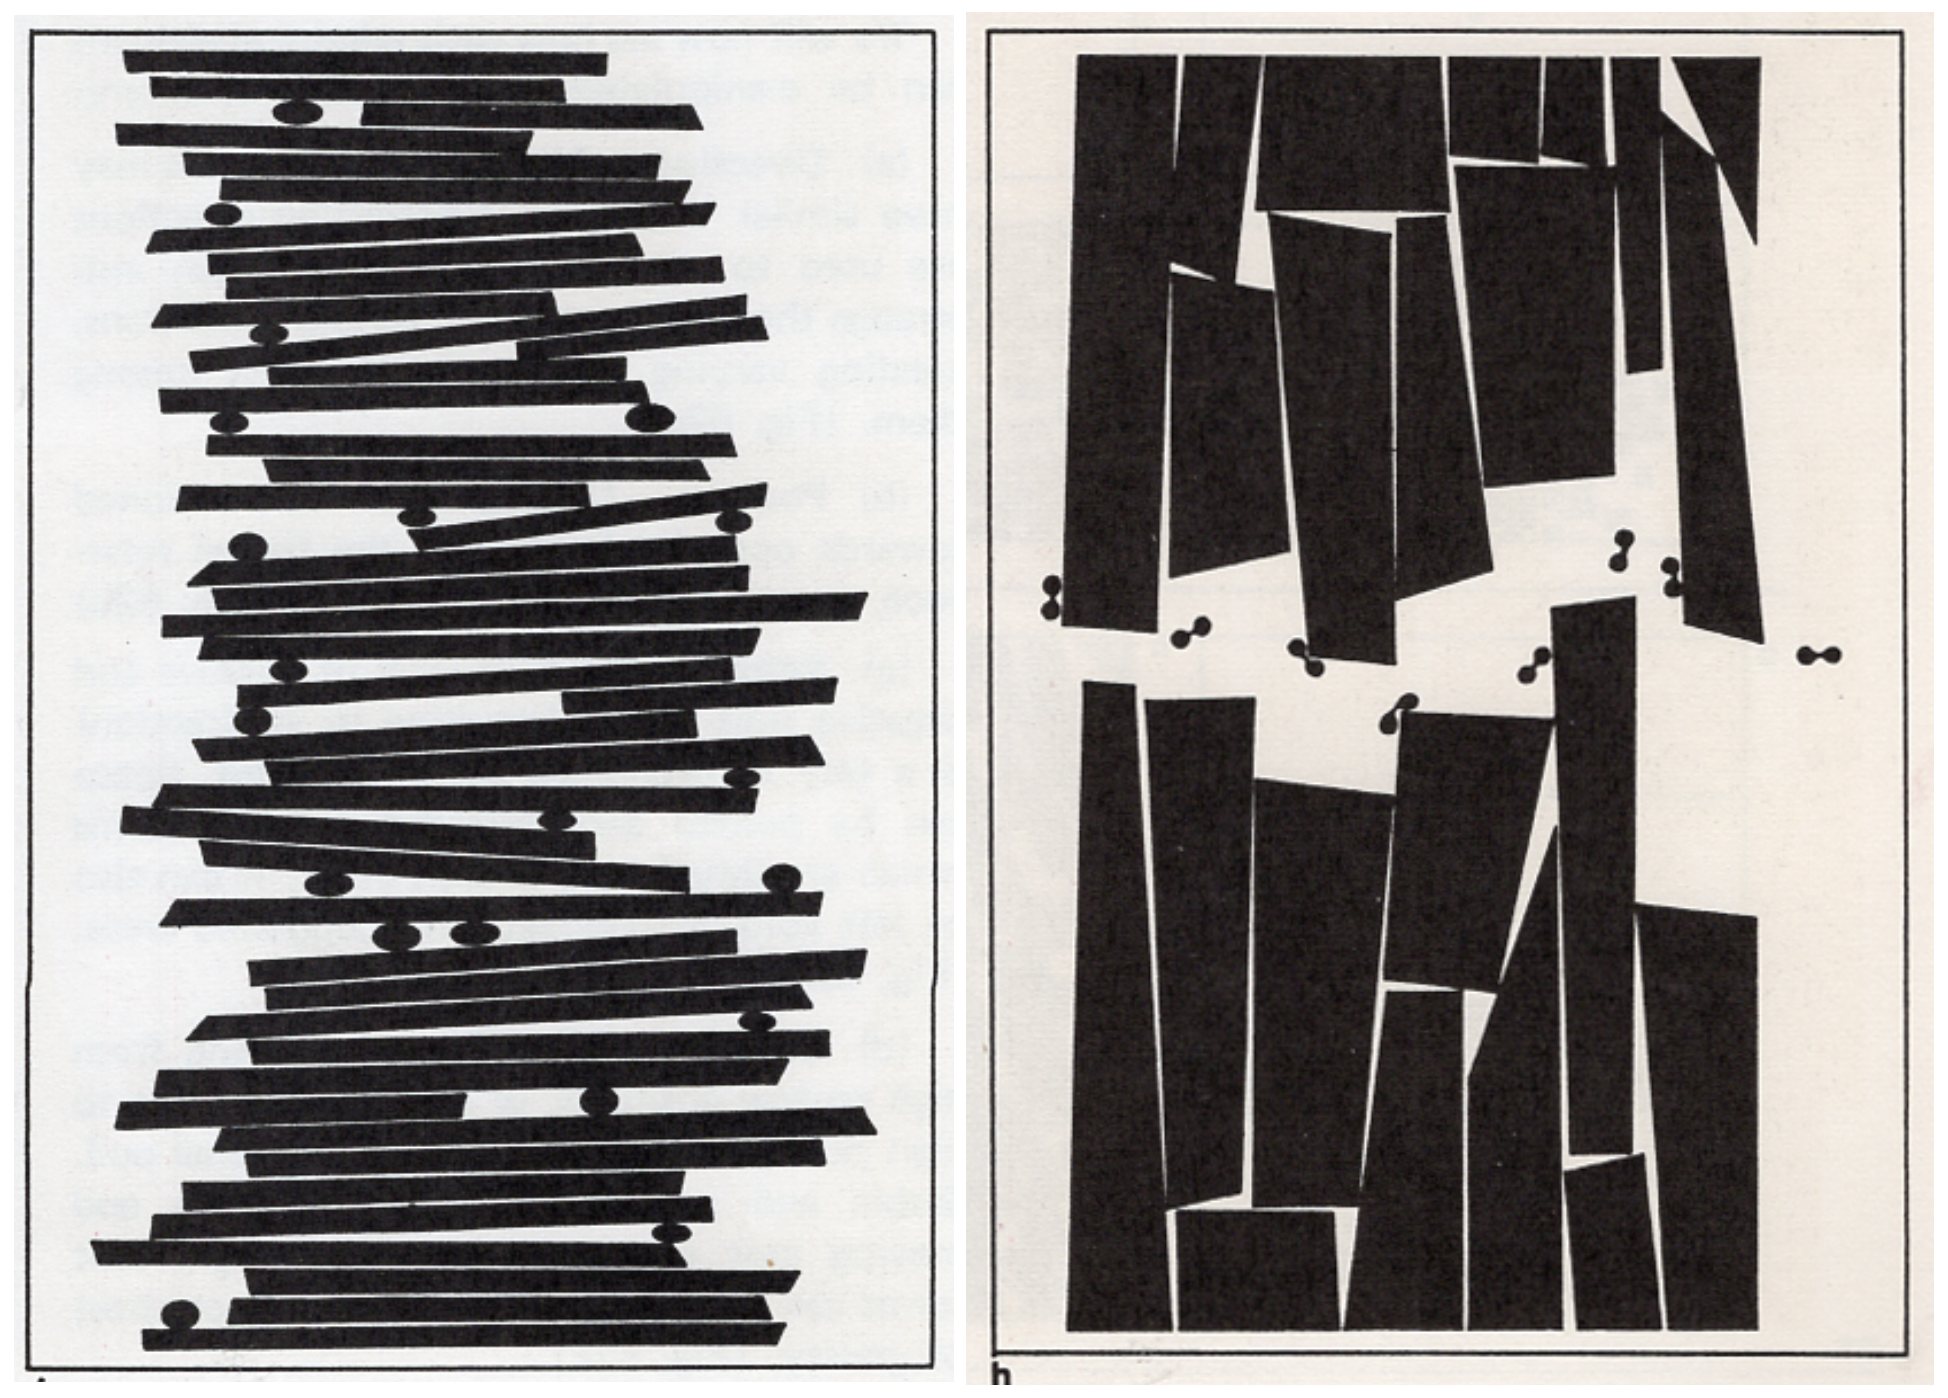
Example showing strong differences in scale, value, shape, direction, and texture

Contrast

Contrast creates a clear difference between visual elements. It may be developed through size, shape, value, direction, position, density, texture, or positive and negative space.
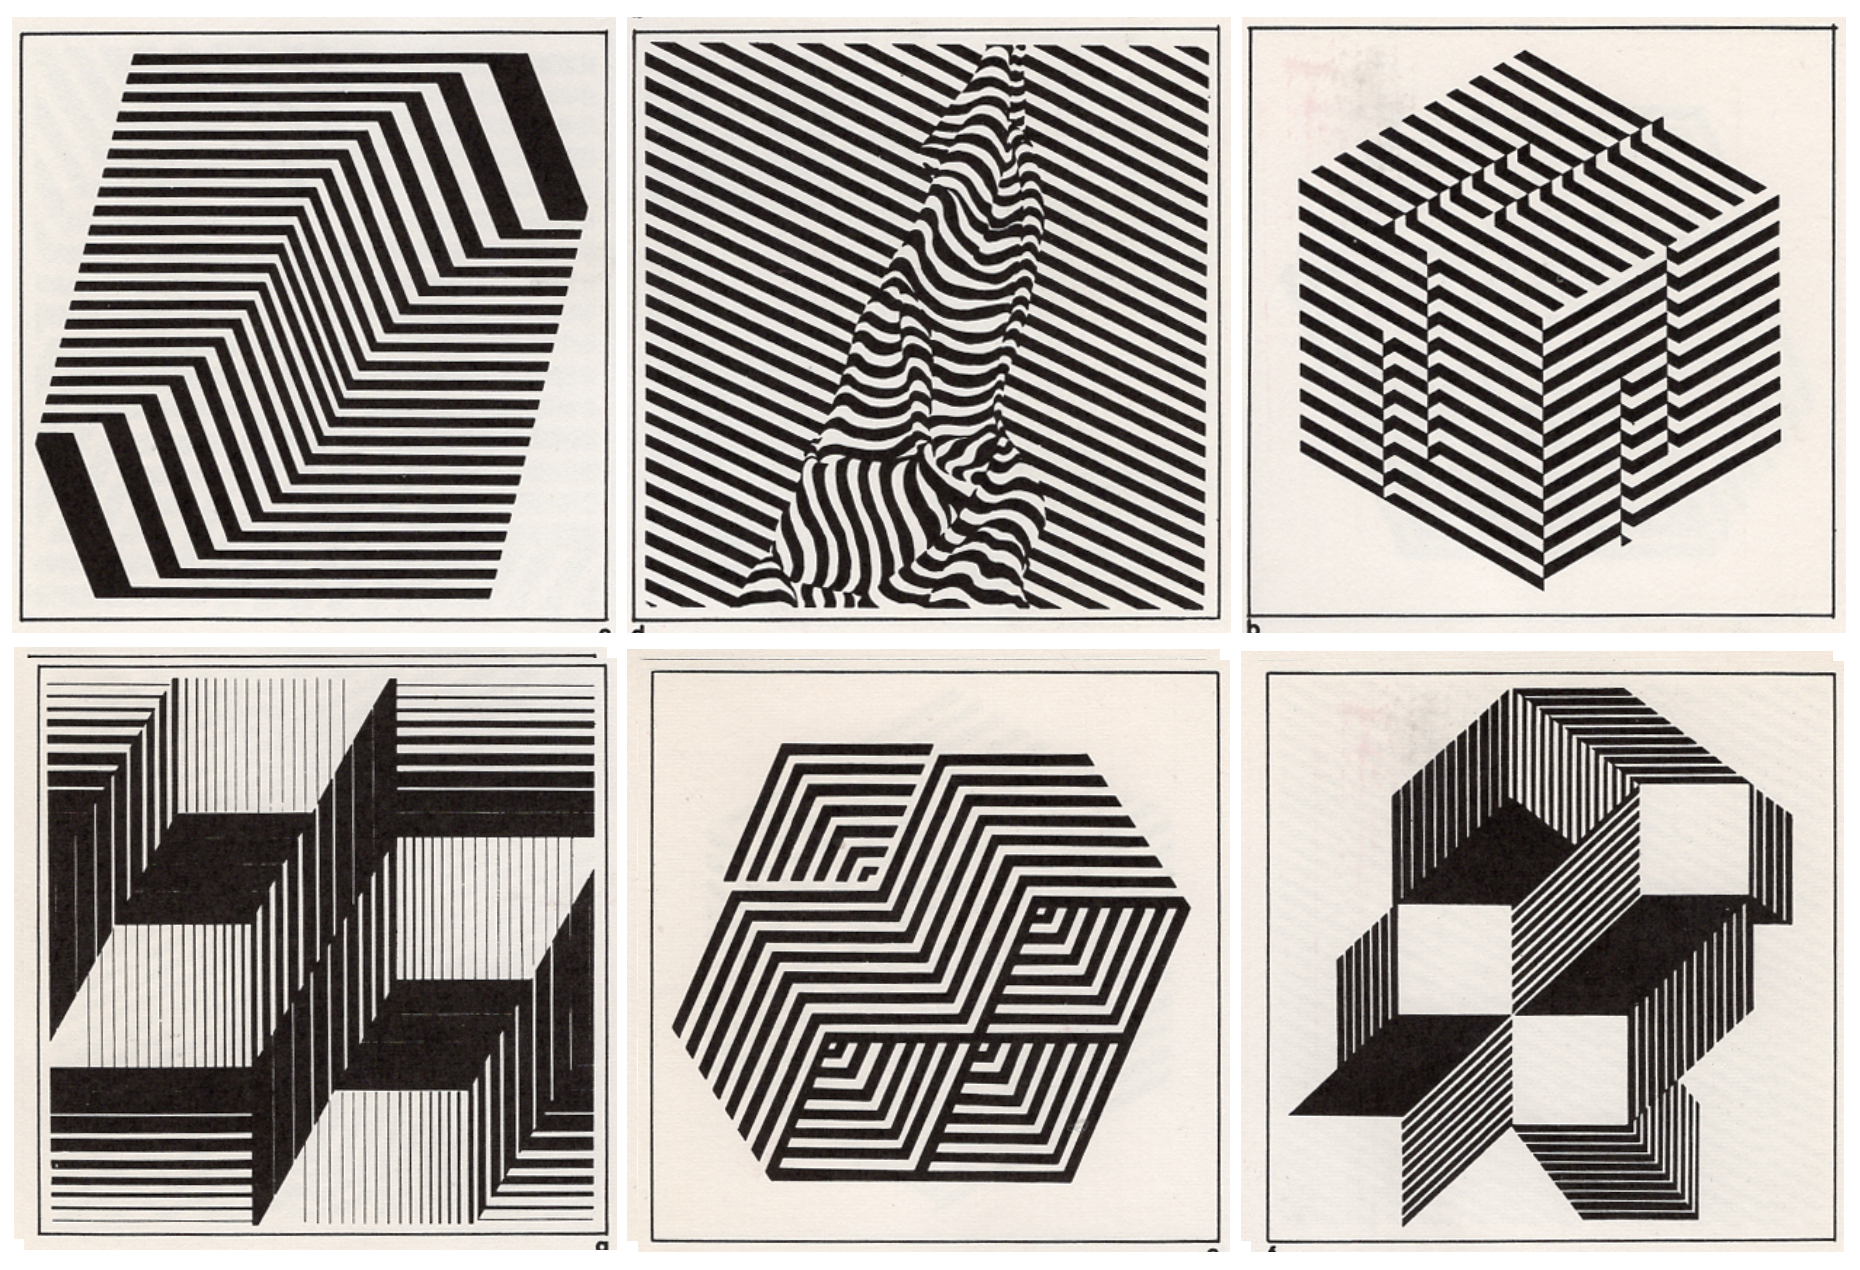
Example showing forms organized to create flat, illusory, or conflicting spatial relationships

Space

Space is created through the relationships between forms and the surrounding field. Scale, position, overlap, cropping, direction, and positive–negative relationships can produce flat, illusory, or fluctuating spatial effects.

Source: Wong, W. (1972). Principles of Two-Dimensional Design. Van Nostrand Reinhold Company.

Form and Space

The activity also applies three approaches from Timothy Samara’s chapter “Seeing Form and Space.”
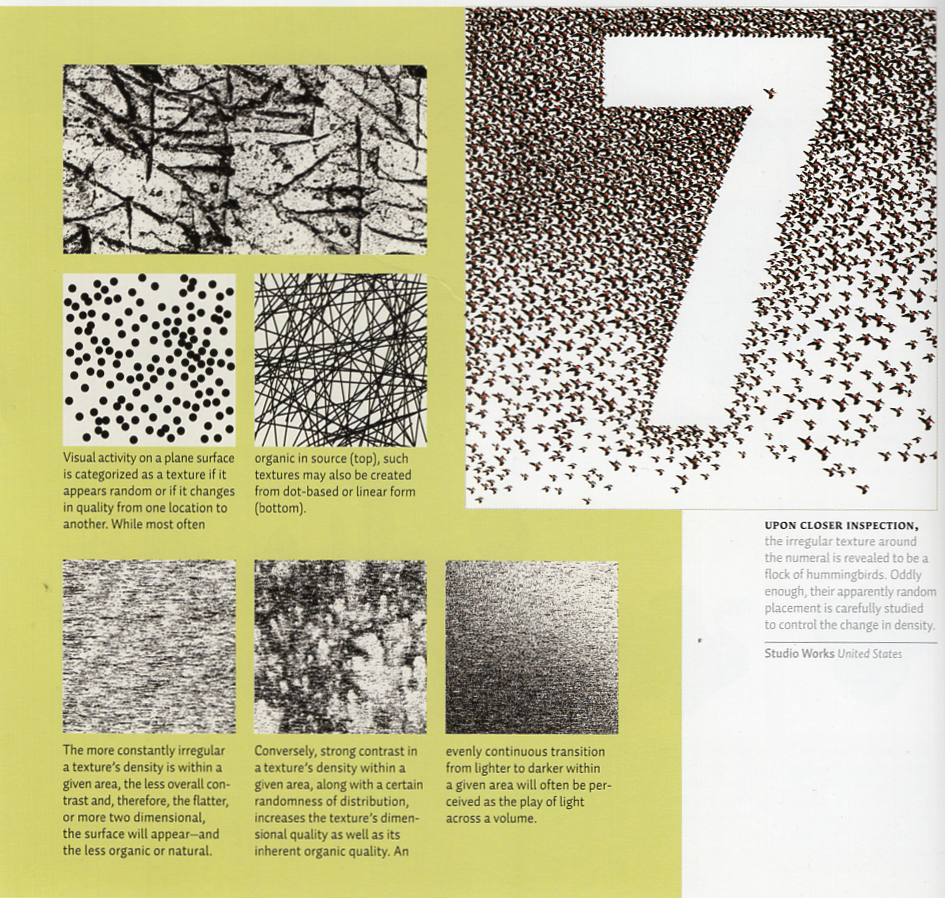
Examples showing surfaces changed through marks, density, direction, texture, and material variation

Surface Activity

Surface activity changes how a plane is perceived through marks, patterns, texture, density, scale, direction, and material variation. These qualities can affect visual weight, movement, depth, and the relationship between a form and its surrounding space.
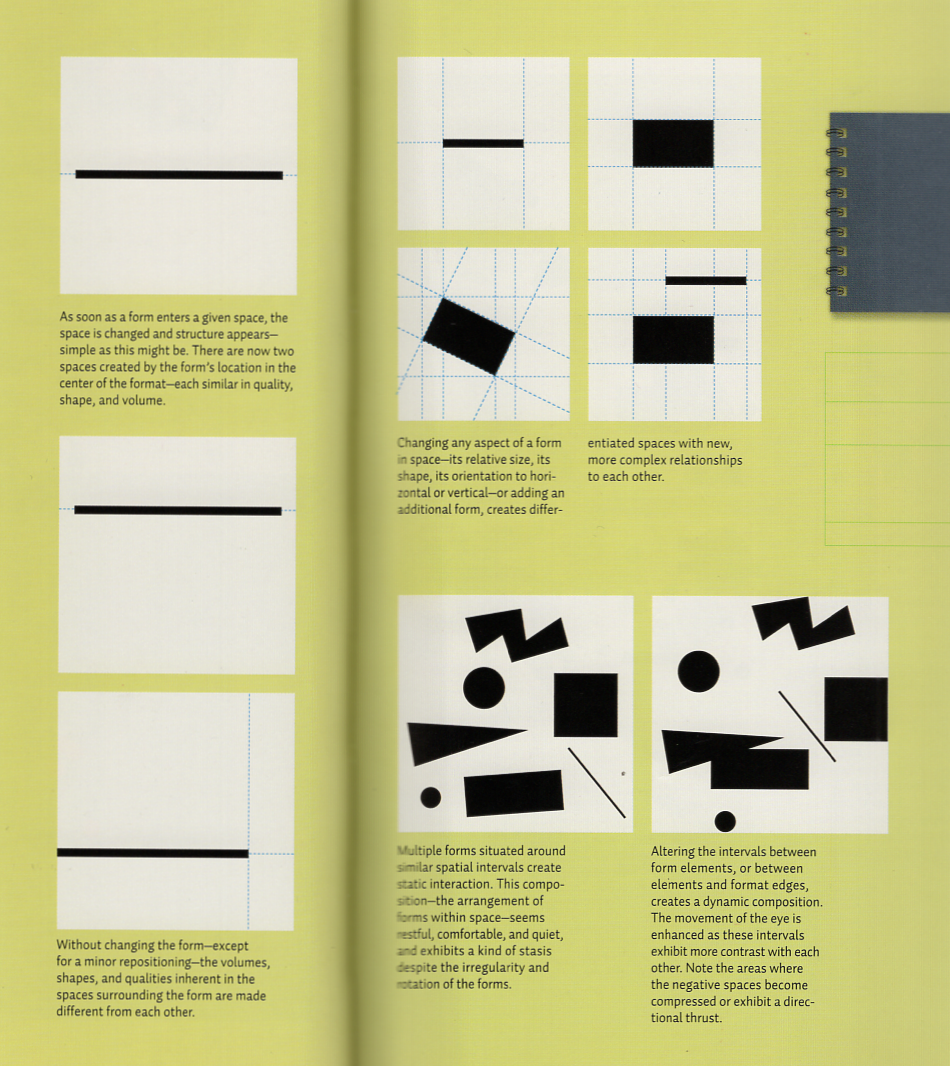
Examples showing forms and lines crossing, touching, dividing, and moving beyond the boundaries of a format

Breaking Space

Breaking space treats the format as an active boundary. Forms may touch, divide, cross, interrupt, or move beyond its edges, changing how the viewer perceives tension, movement, continuity, and the limits of the composition.
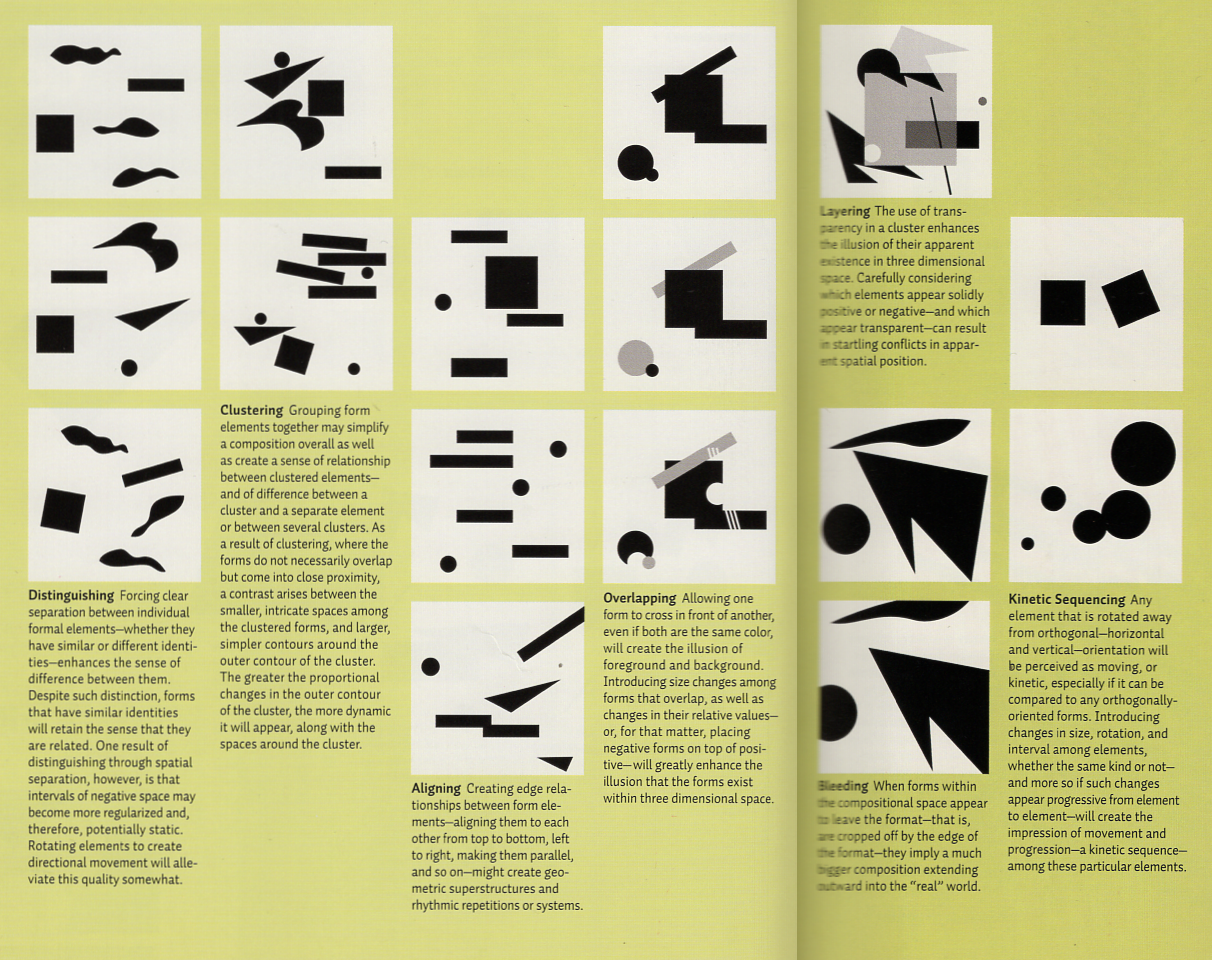
Examples showing forms organized through alignment, clustering, separation, overlap, and hierarchy

Arranging Form

Arranging form establishes relationships between multiple elements. Alignment, grouping, clustering, separation, overlap, scale, and placement can create hierarchy, rhythm, direction, emphasis, and visual order.

Source: Samara, T. (2007). “Seeing Form and Space.” In Design Elements: A Graphic Style Manual (pp. 58–65). Rockport Publishers.

Stage 2: Plan and sketch the three compositions Design each super-unit, select a different repetition grid and grid structure, and plan how the unit will be repeated and altered.

Create one planning page for each composition.

Select the repetition grids

Choose one different repetition grid for each composition. Do not repeat the same grid.

Examples of repetition arrangements

Select the grid that best supports:

  • The assigned Interrelationship of Form
  • The assigned Wong principles
  • The assigned Samara approach
  • The organization of the repeated and altered super-units

Composition 1

Interrelationship of Form Wong principles Samara approach
Union Anomaly + Concentration Arranging Form

Create a super-unit by merging organic shapes through Union. The combined forms must read as one larger form without visible internal boundaries.

Repeat the super-unit to create areas of increasing and decreasing concentration. Introduce one clear anomaly that interrupts the larger visual system and becomes an intentional point of emphasis.

On the planning page:

  1. Draw the super-unit applying the Union relationship of form.
  2. Label how the forms apply Samara’s concept of Arranging Form.
  3. Sketch at least eight repeated instances organized through the selected repetition grid.
  4. Show how changes in spacing, grouping, or density create Concentration.
  5. Identify one intentional Anomaly created through shape, size, position, direction, value, or positive–negative reversal.

Composition 2

Interrelationship of Form Wong principles Samara approach
Subtraction Texture + Contrast Surface Activity

Using accidental shapes, create a super-unit by using one form to subtract an area from another. The subtraction must create a clearly visible contour and negative space.

Use at least one original physical texture digitized with a flatbed or document scanner to address Wong’s principle of Texture. Do not use a phone-scanning app for this requirement. The scanned material should contribute visible surface qualities such as grain, irregularity, roughness, density, or pattern.

Then use graphic elements, such as shapes, points, lines, marks, or repeated forms, to address Samara’s concept of Surface Activity. These graphic elements should activate the surface of the composition through variation, repetition, density, direction, or visual rhythm.

Use Contrast to create a clear distinction between textured and untextured areas, dense and sparse marks, smooth and rough surfaces, or black and white values.

On the planning page:

  1. Draw the super-unit applying the Subtraction relationship of form.
  2. Label where Wong’s concept of Texture will appear through the scanned material.
  3. Label how Samara’s concept of Surface Activity will be developed through graphic elements such as shapes, points, lines, or marks.
  4. Sketch at least eight repeated instances organized through the selected repetition grid different from Composition 1.
  5. Introduce one intentional Contrast created through shape, size, texture, direction, or positive–negative reversal.

Composition 3

Wong principles Samara approach Required visual element
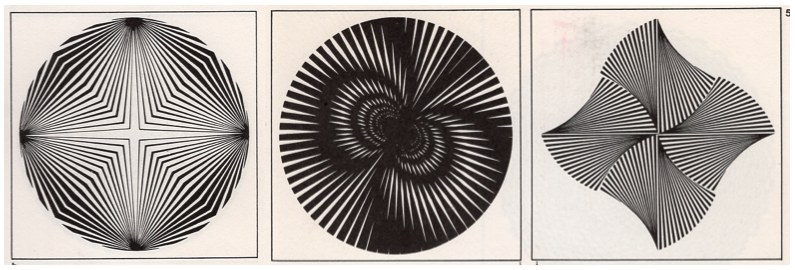
Radiation + Space Breaking Space Repeated lines

Create a composition using repeated lines only varying their thinkness, curvature, direction, etc. This composition does not use an Interrelationship of Form or a super-unit.

Use Radiation to organize the lines around a common centre or multiple related centres. Changes in direction, spacing, length, thickness, and rotation should create movement and emphasis.

Use the repeated lines to explore one type of Space:

Example showing repeated lines arranged without a clear illusion of depth

Flat Space

Flat space keeps forms on the same visual plane. Repeated lines may vary in direction, length, weight, or spacing, but they do not create a clear impression of foreground, background, or depth.

Example showing repeated lines creating the illusion of depth and distance

Illusory Space

Illusory space creates the impression of depth within a flat format. Changes in scale, spacing, direction, overlap, density, or perspective can make lines appear to advance, recede, or extend into space.

Example showing repeated lines producing unstable and contradictory spatial relationships

Fluctuating and Conflicting Space

Fluctuating and conflicting space creates an unstable spatial reading. Lines may appear to shift between foreground and background, while contradictory directions, overlaps, scales, or perspectives prevent one fixed interpretation.

Apply Samara’s concept of Breaking Space by allowing lines to:

  • Divide or interrupt areas of the composition
  • Cross or move beyond the grid
  • Touch or extend beyond the margins
  • Enter or leave the artboard
  • Create tension between the interior and exterior of the format

On the planning page:

  1. Identify the selected type of Space.
  2. Identify the centre or centres of Radiation.
  3. Show how the lines radiate inward, outward, or around the selected centre or centres.
  4. Introduce at least three controlled variations, such as direction, rotation, length, thickness, spacing, curvature, interruption, or cropping.
  5. Label how the lines apply Breaking Space.

The final work must be a developed composition of repeated and altered lines. A single line drawing, isolated group of lines, or regular pattern without controlled variation does not meet the requirements.


Export Sketches

Combine the three planning pages into one PDF:

  • Filename: Lastname-Firstname-CompTech1-Part2-Sketches.pdf

Ask the instructor for feedback before creating the final digital compositions.

Stage 3: Set up and build the three compositions Create the Illustrator files, scan and process the original texture, build each super-unit, and develop the complete compositions.

Create one separate Adobe Illustrator file for each composition.

Set up the Illustrator files

Use the following settings:

  • Units: Pixels
  • Size: 1000 × 1000 px
  • Aspect ratio: 1:1
  • Bleed: 10 px on all sides
  • Colour mode: RGB
  • Raster effects: High, 300 PPI

Create and name these layers:

  1. Guides — grid, margins, and construction lines
  2. Composition — super-units and final vector forms
  3. Background — black or white background field and/or texture

Use these working filenames:

  • Lastname-Firstname-CompTech1-Part2-1.ai
  • Lastname-Firstname-CompTech1-Part2-2.ai
  • Lastname-Firstname-CompTech1-Part2-3.ai
Illustrator document setup

Required tutorial: Follow this tutorial step by step. It includes the required document settings, margin guides, bleed, colour mode, raster-effects resolution, and layer setup. Skipping steps or using different settings may result in lost marks.

Open the “Adobe Illustrator 1 Document Setup” tutorial directly

Additional Illustrator tools

Open the “More tools and behaviours in Adobe Illustrator” tutorial directly

Create the grids

Recreate the selected grid for each composition in the Guides layer.

Use a different grid structure for each file. The grid should organize the placement, alignment, spacing, concentration, and movement of the repeated super-units.

A grid may remain visible only when its visible structure is an intentional part of the final composition.

Although grids begin as drawn lines, all grids—unless they are intentionally visible—must be converted into guides. This ensures that the grid remains available in Illustrator but does not appear when the document is printed or viewed outside Illustrator.

Open the “Creating more complex grids in Adobe Illustrator” tutorial directly

Note: If you’re using the grid tool for this process, to convert it into guides press Cmd + 5 (Mac) Ctrl +5 (Windows)

Create the original super-units

Use geometric, organic, or accidental shapes to create:

  • Composition 1: Union + Arranging Form
  • Composition 2: Subtraction + Surface Activity

Place the original super-unit in the Composition layer.

Before repeating it, confirm that:

  • The assigned Interrelationship of Form is clearly visible.
  • The assigned Samara approach shapes the construction or spatial use of the super-unit.
  • The super-unit is visually resolved and can support controlled variation.

Open the “Interrelationships of Form in Adobe Illustrator 2” tutorial directly

Create the original scanned texture

Check:

The texture used in Composition 2 must be created by you with a flatbed or document scanner.

Possible materials to scan:

  • Paper
  • Cardboard
  • Fabric
  • Thread or string
  • Leaves or dry plant material
  • Packaging
  • Printed marks or fragments created by you
  • Crumpled, folded, cut, layered, or torn materials
  • Other safe objects with visible surface detail

Do not place wet, dirty, sharp, abrasive, sticky, or damaging materials on the scanner.

Use:

  • Resolution: Minimum 300 PPI
  • Recommended resolution: 600 PPI for small or highly detailed materials
  • Colour mode: Colour or grayscale
  • File format: TIFF or PNG
  • Cropping: Do not crop the original source scan
  • Editing: Do not edit the original source scan

Save the original file immediately after scanning:

  • Lastname-Firstname-CompTech1-Part2-Texture.tif

Use .png only when the scanner does not provide TIFF.

Process a copy of the scanned texture

Do not edit the original source scan.

Open a duplicate in Adobe Photoshop and convert it to grayscale or black and white You may also:

  • Crop or rotate
  • Adjust Levels or Curves
  • Increase or reduce contrast
  • Use Threshold
  • Clean minor scanner dust
  • Repeat or combine sections from your own scan

Save your image as a TIFF with the Photoshop layers preserved. This allows you to continue editing the file.

Open the “Working on Image Textures in Adobe Photoshop” tutorial directly

Import and embed the texture

  • Import the processed texture into Composition 2.
  • If the texture appears only in the background, place it in the Background layer. Otherwise, place the texture in the Composition layer.
  • Apply it within the super-units or their negative spaces.
  • Use it to create Texture and Contrast.
  • Embed the image before saving and exporting the PDF file.

Embed image before exporting. Points will be deducted when linked images are missing or not embedded.

Open the “Importing and Masking an Image in Adobe Illustrator” tutorial directly

Develop the complete compositions

For each file:

  1. Composition 1 & 2:
    • Repeat the super-unit at least eight times.
    • Maintain the assigned Interrelationship of Form throughout the repeated system
    • Use the selected repetition grid to organize the complete composition.
  2. Use the assigned Wong principles:
    • Composition 1: Anomaly and Concentration
    • Composition 2: Texture and Contrast
    • Composition 3: Radiation and Space
  3. Apply the assigned Samara approach:
    • Composition 1: Arranging Form
    • Composition 2: Surface Activity
    • Composition 3: Breaking Space
  4. Consider the relationship between the composition and the square format, including its grid, margins, edges, cropping, placement, and negative space.
  5. Refine visual balance with your eyes rather than relying only on mathematical alignment.

The repeated instances must operate as a complete composition. A single super-unit, a row of identical copies, or copies placed without a clear visual system will not meet the activity requirements.

Example of a developed composition built from repeated units

Stage 4: Review and Export Part 2 Check the compositions, original scan, layers, guides, margins, and editable PDF settings before submitting Part 2.

Before submitting

Your PDF files will be opened in Adobe Illustrator to review the document setup, layers, guides, margins, embedded texture, and construction of the compositions.

Check the Illustrator document structure

For each composition, confirm that the file contains:

  1. Guides
    • Contains the selected grid structure
    • Contains the margin guides created during the document setup
    • Contains only guides and construction elements
  2. Composition
    • Contains the original super-unit
    • Contains all repeated and altered instances
    • Contains the final black-and-white vector forms
    • (if used here:) Contains an embedded image rather than a missing linked file
  3. Background
    • Contains only the black or white background field
    • Contains the processed scan
    • (if used here:) Contains an embedded image rather than a missing linked file

Do not leave artwork on the wrong layer or create unnecessary unnamed layers. You may create sub-collections (or groups inside layers) for better organization.

Check the guides and margins

Before saving each PDF:

  • Convert the grid structure into Illustrator guides unless it is intentionally visible.
  • Keep the grid and margin guides inside the Guides layer.
  • Confirm that View → Guides → Show Guides is active.
  • Keep the Guides layer visible when saving the file.
  • Confirm that the original margin guides remain present.
  • Confirm that the grid and margins align correctly with the artboard.
  • Do not expand, delete, rasterize, or merge the guides with the composition.

Guides should be visible when the PDF is opened in Illustrator, but they will not appear as part of the printed or externally viewed artwork.

Check the original scan

Confirm that:

  • The original scan is unedited and uncropped.
  • The filename follows the required structure.
  • The scan was created with a flatbed or document scanner, not a phone-scanning app.
  • The original scan is included as a separate submission file.
  • Name and extension: Lastname-Firstname-CompTech1-Part2-Texture.tif

Use .png for the original scan only when TIFF is unavailable from the scanner.

Save the editable PDF

Use File → Save As → Adobe PDF.

In the Adobe PDF settings, select:

  • Preserve Illustrator Editing Capabilities

This setting is required so that the layers, guides, editable vector objects, embedded texture, artboard, and document structure remain available when the PDF is reopened in Illustrator.

Final file check

Open each submitted PDF twice:

Final PDF checklist

  • Check the PDF in a PDF viewer. Confirm that the final composition displays correctly and that no unintended guides or construction elements appear in the artwork.
  • Check the PDF in Adobe Illustrator. Confirm that the file opens correctly and remains editable.
  • Check the layers. Confirm that the required layers remain separate, correctly named, and contain the correct material.
  • Check the grid. Confirm that the grid has been converted into guides unless it is intentionally part of the visible composition.
  • Check the guides and margins. Confirm that the grid guides and original margin guides remain available and visible in Illustrator.
  • Check editability. Confirm that all required vector objects remain editable and have not been flattened or rasterized.
  • Check the texture in Composition 2. Confirm that the processed scanned texture is embedded, appears in the correct layer, and does not rely on a missing linked file.
  • Check the document settings. Confirm that the artboard size and bleed remain correct.
  • Check the filename. Confirm that the filename follows the required naming structure exactly.

Submission files

Item Required filename
Sketches PDF Lastname-Firstname-CompTech1-Part2-Sketches.pdf
Composition 1 PDF Lastname-Firstname-CompTech1-Part2-1.pdf
Composition 2 PDF Lastname-Firstname-CompTech1-Part2-2.pdf
Composition 3 PDF Lastname-Firstname-CompTech1-Part2-3.pdf
Original unedited scan Lastname-Firstname-CompTech1-Part2-Texture.tif

Use .png for the original scan only when TIFF is unavailable from the scanner.

Files that cannot be opened, identified, or accessed may need to be resubmitted and may be considered late. Missing layers or margins, unconverted grids, missing or linked textures, altered original scans, flattened or non-editable files, incomplete repetition, or compositions based on only one isolated super-unit will affect the grade.


Credits: Jessica A. Rodríguez