MediaArtTutorials
| MOCAP Tutorials | Home |
⚙️ PN3 QuickStart Guide
Perception Neuron 3 (PN3) – General Setup & Sensor Initialization in Axis Studio
🧰 What You’ll Need:
- Fully charged PN3 sensors and hub
- PN3 suit or straps
- Axis Studio installed on your computer
- USB receiver plugged into your computer
- 3×3 meter workspace (minimum) free of obstacles and metal interference
Step 1: Check Everything is Connected
Open Axis Studio and Create New Project. Go to the Capturing tab → Sensor Check panel.
Make sure the device shows as Connected and all sensors are online.
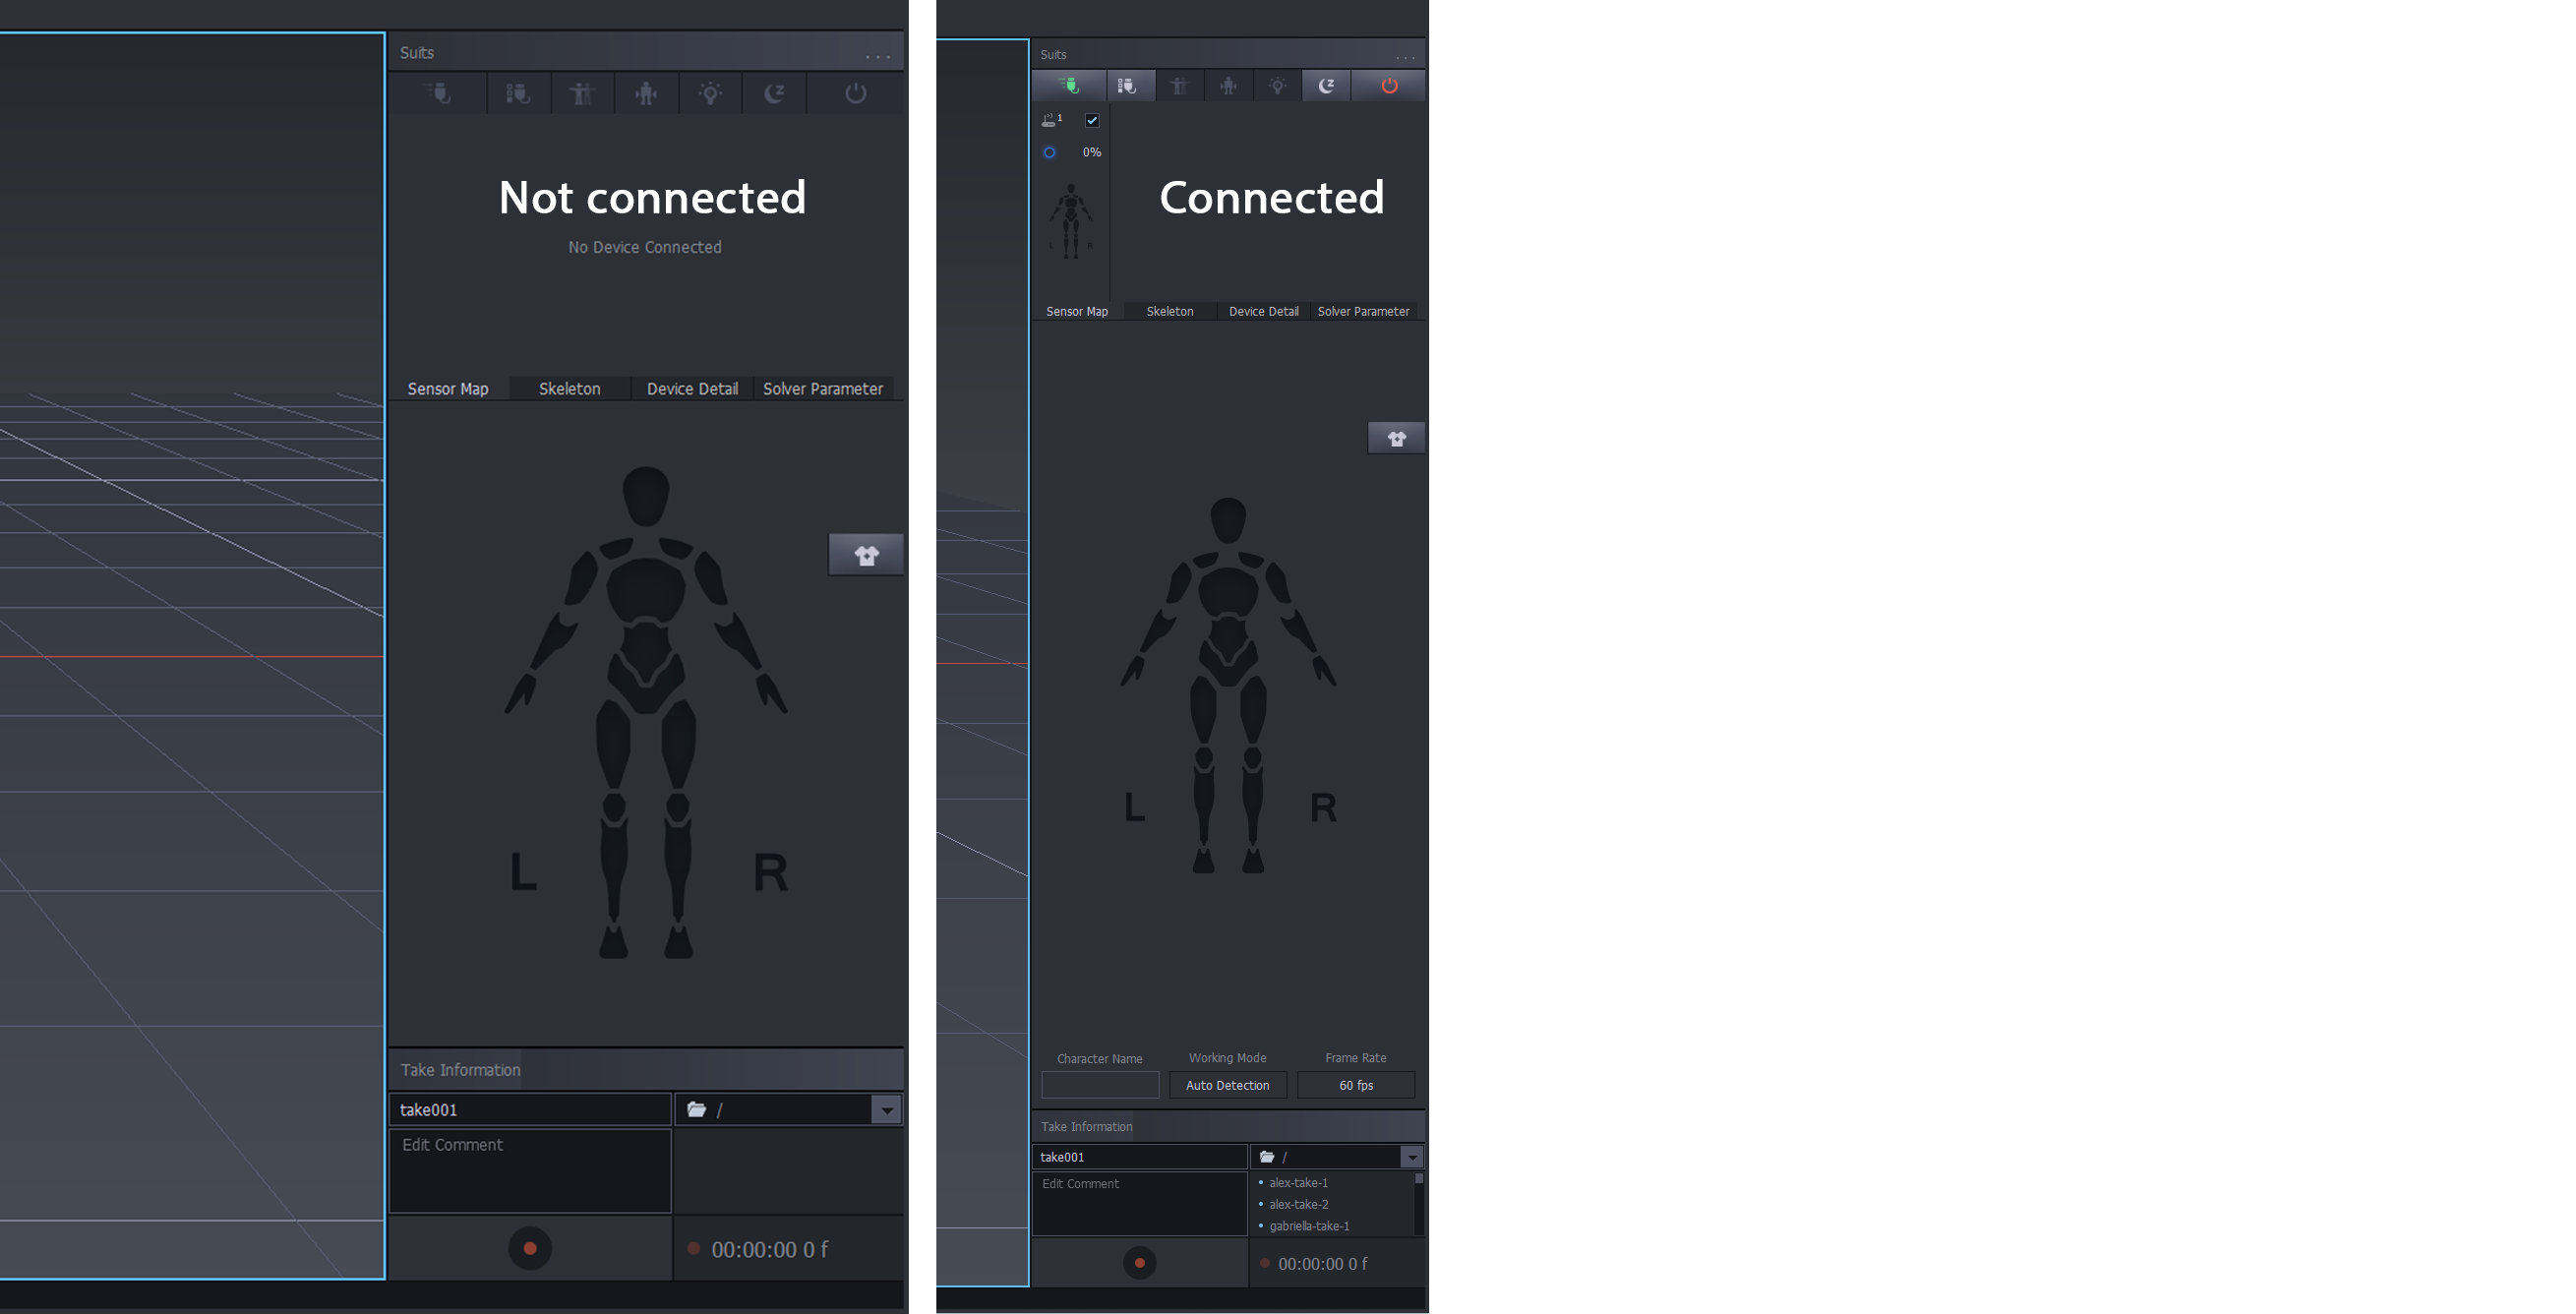
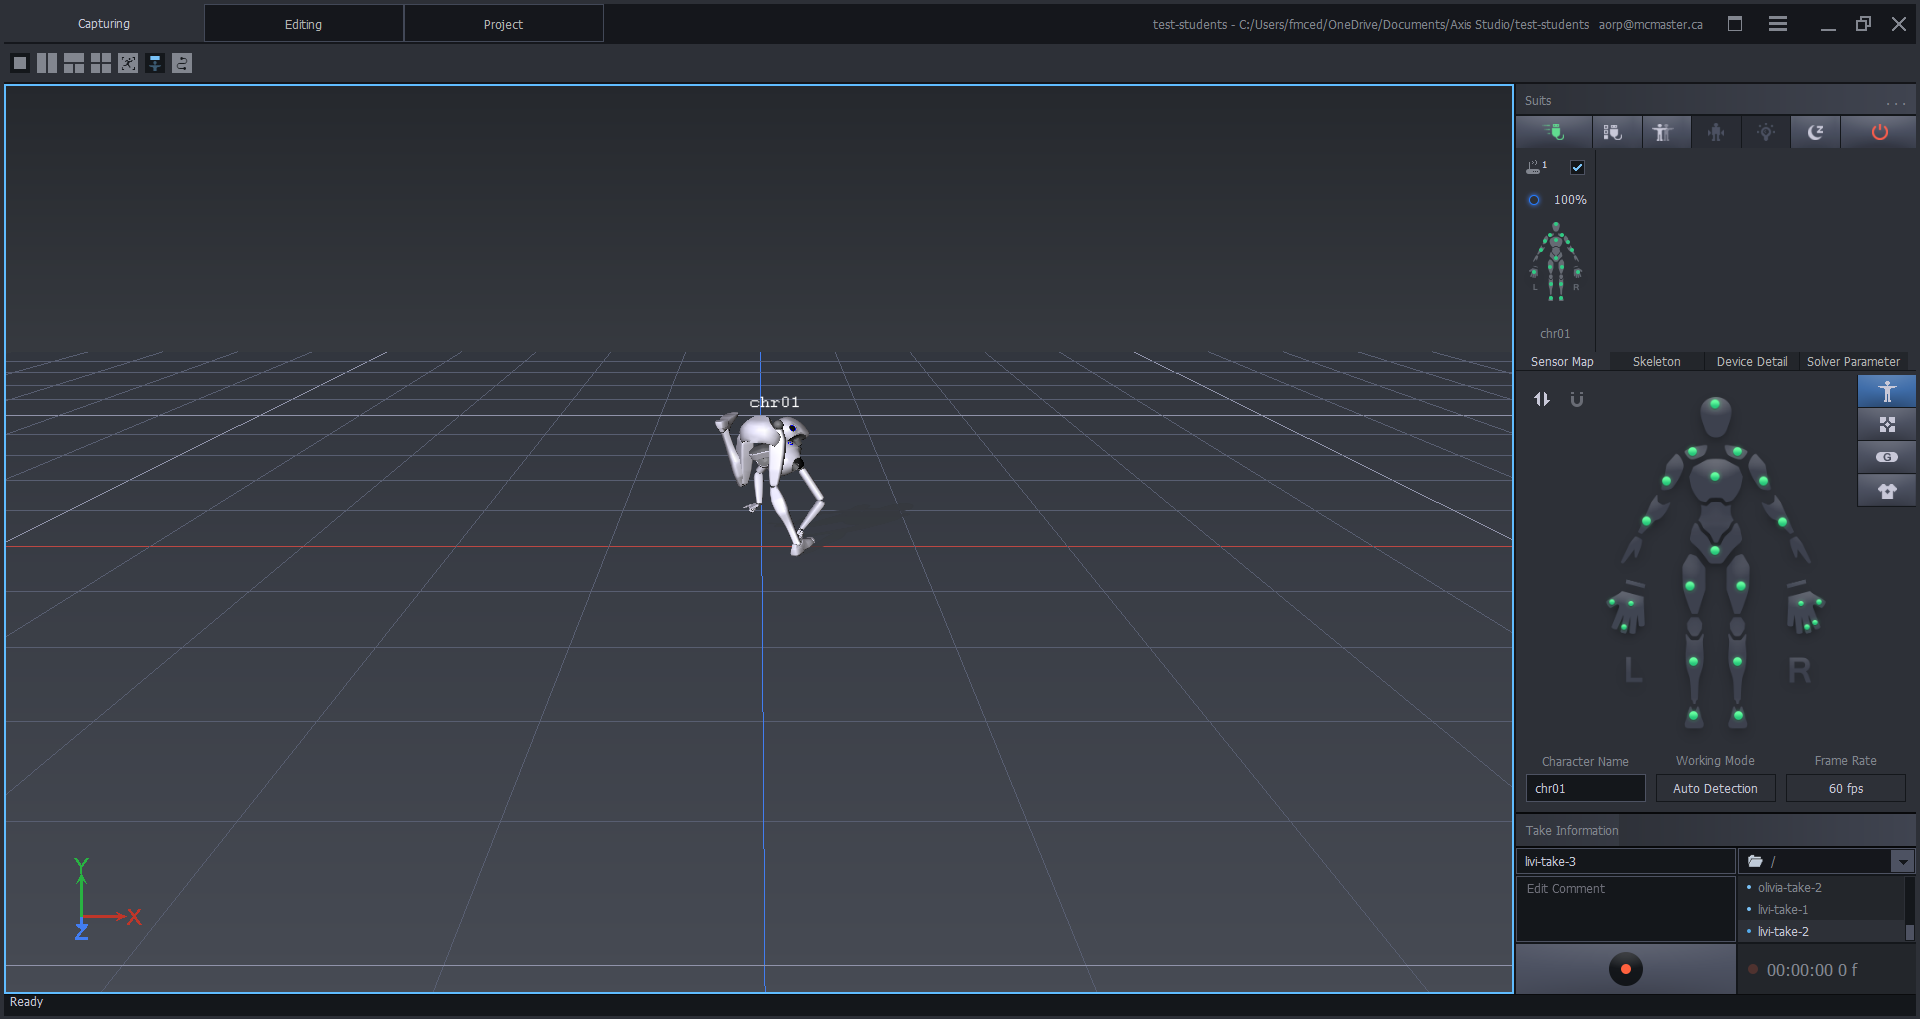
Step 2: Sensor Check
Axis Studio → Capturing Tab → Sensor Check Panel
Follow the on-screen instructions

🔌 Turn On Sensors
Choose one method, then click Next:
- Manual: Hold the power button on the hub for 2 seconds
- Auto: Unplug and reconnect the USB-C power cable to auto-start sensors
🪑 Sensor Placement
- Place sensors on the charging dock on a non-magnetic table or stool
- Avoid magnetic surfaces or devices (metal desks, speakers, etc.)
- Click Next
✅ Sensor Check
The system will automatically run the following diagnostics:
- Signal Quality Check – verifies stable wireless connection
- Gyro Calibration – aligns the sensors’ internal orientation tracking
- Alignment Check – ensures correct placement and positioning of sensors
✔️ Checking Result
- All sensors must show as Connected
- Click Finish
Tutorial
🧍 Step 3: Wear the Sensors
🟢 Proper Sensor Placement
Use the [PN Studio] tab in Axis Studio for reference.
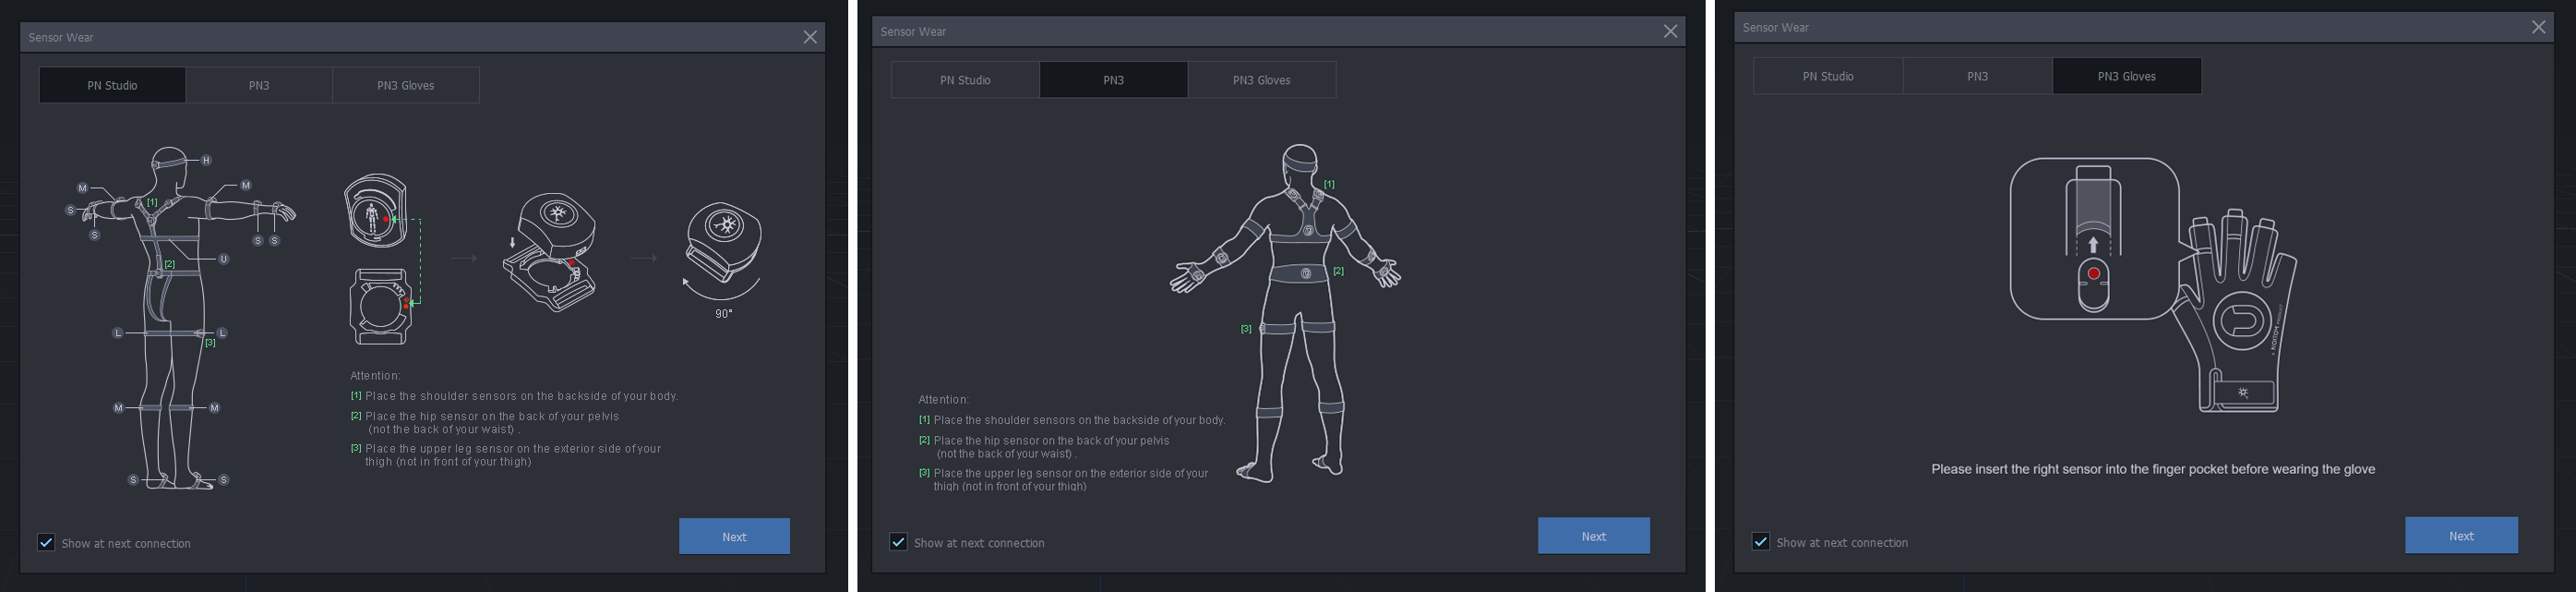
Key sensor locations:
- [1] Shoulders – Attach to the upper back of each shoulder
- [2] Hip – Place firmly on the back of your pelvis, not lower back
- [3] Upper Legs – Attach on the outside of each thigh, not the front
- Feet, arms, and wrists – Follow strap guides for symmetrical placement
🧠 How Sensors Work
Each PN3 sensor uses an inertial measurement unit (IMU) to track movement through acceleration, rotation, and orientation.
The hub receives data wirelessly from each sensor and streams it to Axis Studio in real time for live motion tracking.
Click Next and follow the instructions to complete the initial general calibration.
This calibration won’t be perfect — you will need to perform a full Posture Calibration in Step 4.
Step 4: Posture Calibration
Follow the instructions in 🧍♂️ Posture Calibration in Axis Studio to complete body alignment before recording.