MediaArtTutorials
| Blender Tutorials | Home |
💡 Lighting & 🎥 Camera
Time: 40 min
🎯 Objective
Learn how to set up lighting and a camera in Blender to create a mood or focus attention in your scene. Experiment with color, strength, and angle to change how your scene feels.
🔧 Tools You’ll Use
| Tool / Feature | Shortcut / Location | Purpose / Use |
|---|---|---|
| Add Light | Shift + A → Light |
Add Point, Sun, Area, or Spot lights |
| Move / Rotate | G, R |
Position lights and cameras |
| Rendered View | Z → Rendered |
Preview lighting in real-time |
| Light Settings | Light Properties Tab (💡 icon) | Adjust strength, color, softness |
| Add Camera | Shift + A → Camera |
Add a camera to your scene |
| Look Through Camera | Numpad 0 |
Switch to camera view |
| Lock Camera to View | N → View → Lock Camera to View |
Move the camera using viewport navigation |
| Camera Settings | Camera Properties Tab (📷 icon) | Adjust focal length, depth of field, and other options |
| Save Your Work | File → Save |
Keep progress safe; use clear filenames |
Add Lighting
Step 1: Add a Light
Shift + A → Light- Choose from:
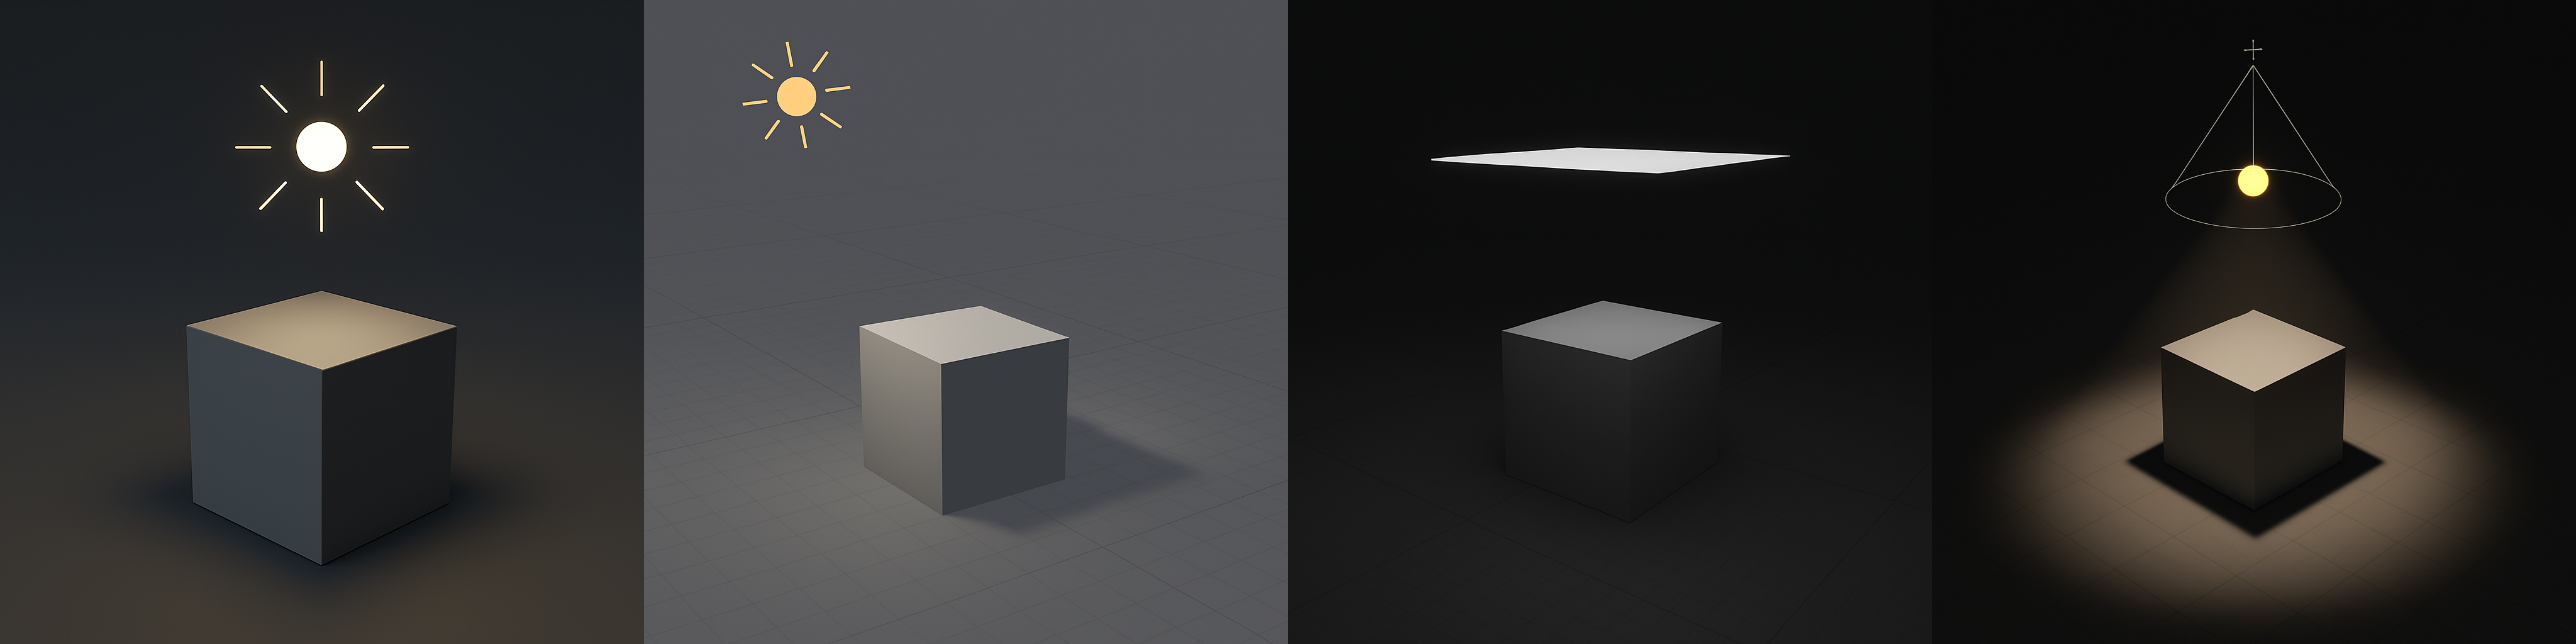
- Point – Emits light from one spot in all directions
- Sun – Mimics sunlight, great for outdoor scenes
- Area – Soft, rectangular light source (good for studio or room lighting)
- Spot – Cone-shaped light (useful for dramatic or focused light)
Step 2: Position the Light
- Use
Gto move,Rto rotate
Step 3: Adjust Light Settings
- In the Light Properties tab (green lightbulb icon):
- Change Strength to make it brighter or dimmer
- Pick a Color to set mood
- Adjust Size (Area Light) or Angle (Sun Light) for softness
Step 4: Preview the Lighting
Z → RenderedOR click the shaded ball in the top-right viewport corner- Switch to Rendered View to see how the light affects your scene
💡 Lighting Preset Ideas
| Style/Setting | Setup Tips |
|---|---|
| 🌞 Sunny Day | Use Sun Light with slight yellow tint, medium strength, soft shadows |
| 💡 Cozy Room | Use Area Light near the ceiling + Point Light near objects |
| 🎭 Dramatic | Use Spot Light from the side, high contrast, colored rim light |
| 🧪 Sci-Fi/Neon | Use colored Point Lights (blue, green, pink), low ambient light |
| 🌫️ Foggy/Moody | Use Sun Light with grayish color, soft shadows, low intensity |
| 🎬 3-Point Studio | Use Key Light, Fill Light, and Back Light with Area or Spot |
Tutorials
🎥 Add a Camera
Step 1: Add and Position
Shift + A → Camera- Use
Gto move,Rto rotate - Press
Numpad 0to look through the camera - Use
GandRin Camera View to reframe the shot - ⚠️ For now, we’re only working with still cameras. Don’t animate your camera yet.
Step 2: Lock Camera to View (Optional)
- Press
N→ View → Check Lock Camera to View - Now navigate in viewport to position your shot
Step 3: Change Camera Settings
- Select camera → Camera Properties tab
- Adjust Focal Length for wide/zoomed view
- Choose Depth of Field to blur background (optional)
📸 Camera Preset Ideas
| Camera Type | Description & Use |
|---|---|
| 👁️ Over-the-Shoulder | Great for storytelling; place camera behind character |
| 🐜 Low Angle | Camera placed near the ground, looking up — makes subject feel powerful |
| 🛰️ Top Down (Bird’s Eye) | Use for maps, layouts, or god-like perspective |
| 🪟 Framed View | Position camera through a window or doorway for visual framing |
| 🤖 Dolly/Tracking Shot | Animate camera moving beside a character or object |
| 🎬 Close-Up | Zoom in on a face, detail, or emotion; tight framing with shallow depth |
| 🌍 Wide Shot | Show the whole environment; helps with mood and scale |
Tutorials
Learn how to have two views at the same time
Learn more about the Camera settings - ⚠️ Watch it only until 9:16
💾 Save Your Work
File → Save- Filename:
YourName_SceneLights.blend - Save to USB or class folder
📝 Reflection
What kind of mood or feeling do your lighting and camera choices create?
→ Write down 1–2 words: (e.g., “dreamy,” “mysterious,” “playful,” “cinematic”)