MediaArtTutorials
Digital Mixed Media Animation – Part 2
Objective
Transform your printed black-and-white frame grids into a mixed-media animation sequence by applying physical interventions such as drawing, collage, painting, and texture.
This stage explores analogue creativity and material storytelling, adding expressive and tactile qualities to your digital footage.
Materials Required
- Printed black-and-white frame grids (from Part 1)
- Mixed-media materials:
- Markers, crayons, pastels, paint
- Coloured paper, cut-outs, thread, fabric
- Tape, glue, scissors
- Optional: stamps, found textures, magazine clippings
Activities
Complete the following activities in class. Ask your professor or TA for guidance or feedback.
[Class Time] Animate Frame by Frame (Individual Work)
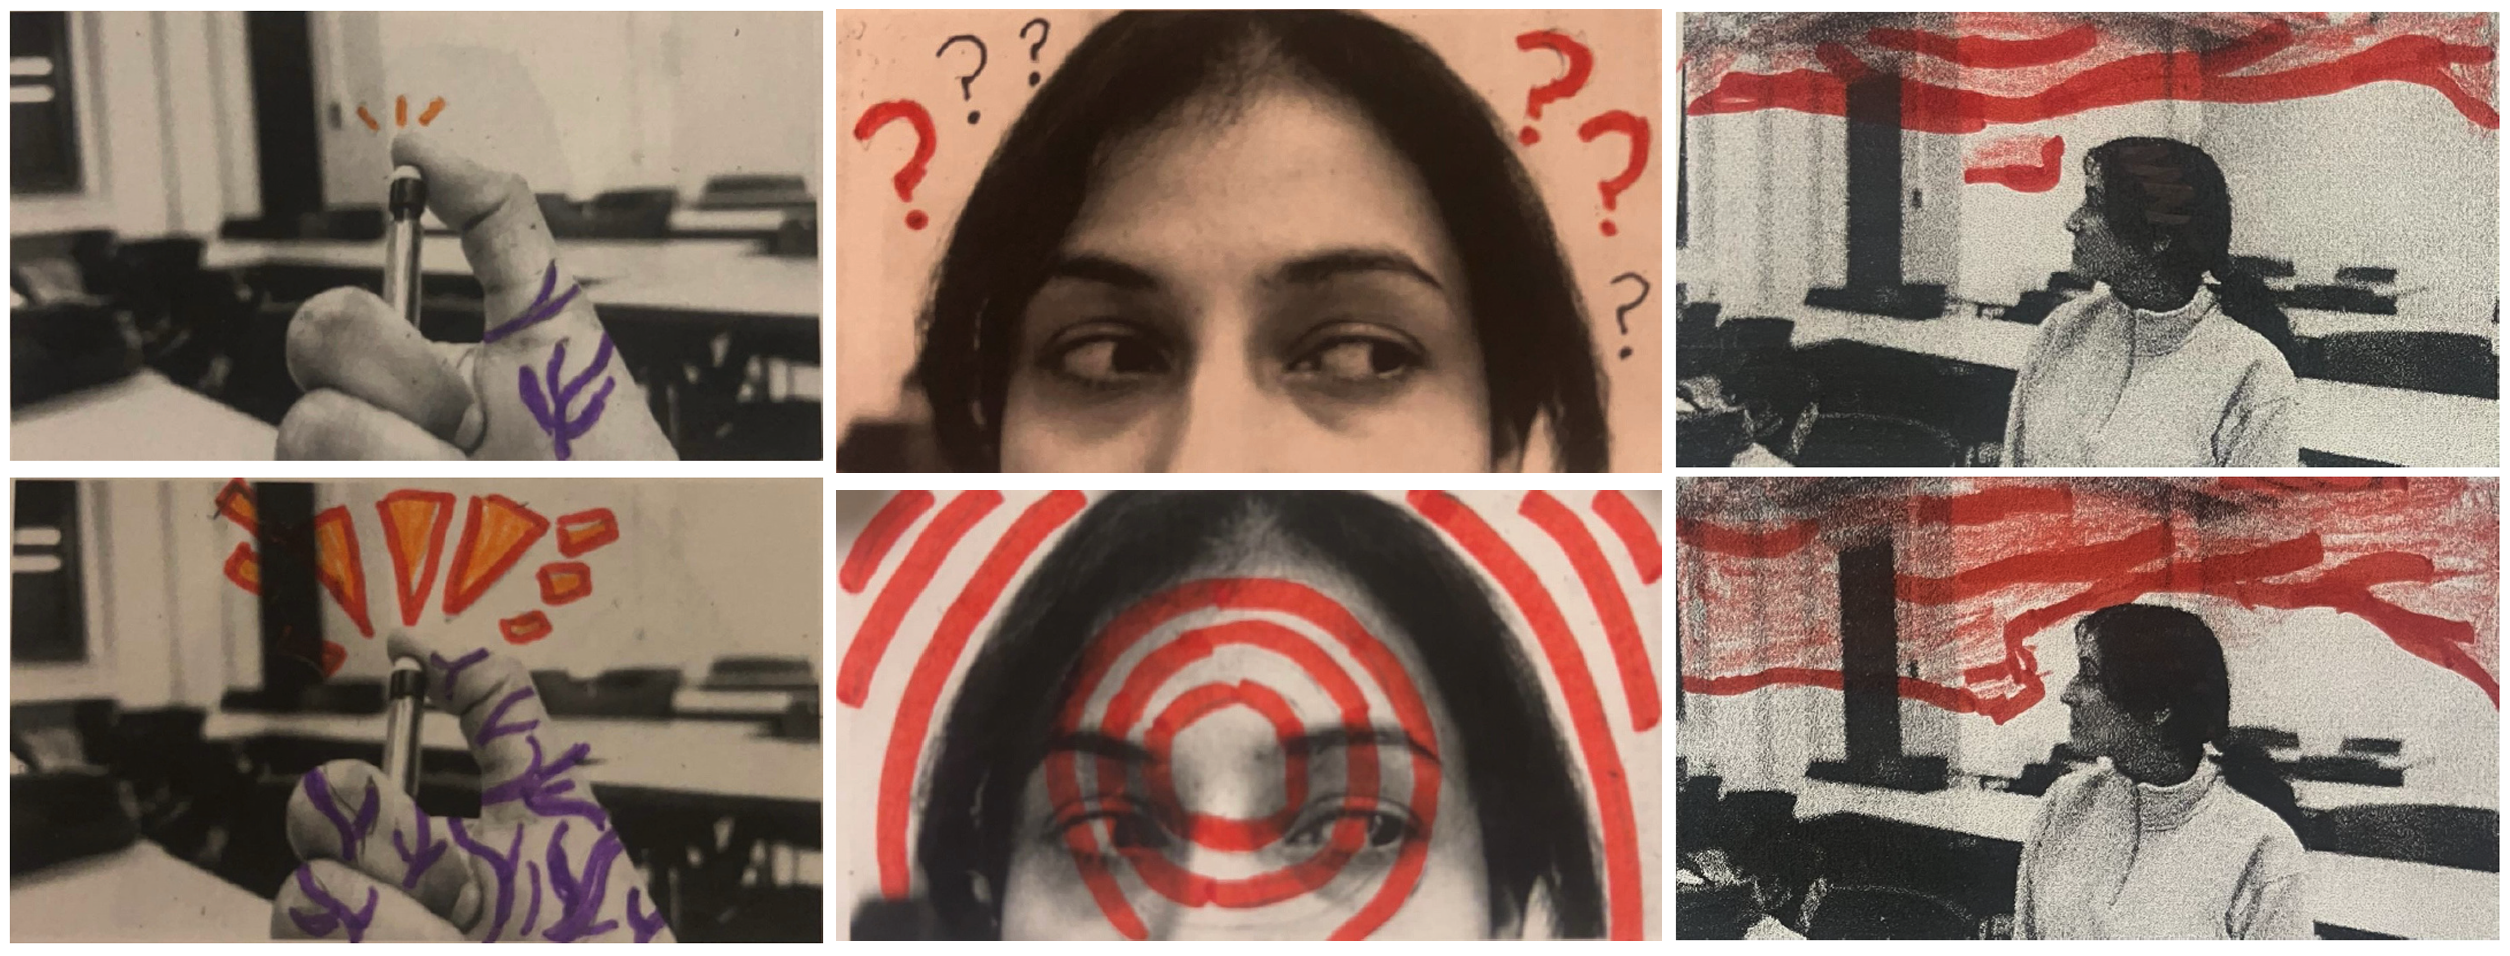
Apply physical interventions to each printed frame to create a dynamic, evolving sequence.
Approaches to Try:
- Hand-Drawn Animation
- Gradually change drawings or marks from frame to frame to simulate motion.
- Collage & Cutouts
- Add paper textures, geometric shapes, or layered silhouettes.
- Painting & Color Interventions
- Use ink, watercolour, or pastel to bring emotion and transformation.
- Thread & Textiles
- Stitch or glue fabric, thread, or yarn across frames.
- Erasure & Reconstruction
- Modify or partially erase parts of frames to show visual evolution.
Goal: Make each frame different while maintaining flow across your sequence.
Digitize and Prepare Your Frames (Individual Work)
After completing your analogue interventions, you must digitize your frames and prepare them as individual image files for use in Part 3 of the project.
Step 1 — Digitize Your Artwork (Scan or Photograph)
If Scanning (recommended):
- Use a flatbed scanner at 300 DPI
- Scan entire page or individual frames
- Save as PNG or high-resolution JPEG
- Align frames before scanning
If Photographing:
- Photograph each frame individually
- Use consistent lighting and angle
- Mount paper on a wall or table
- Avoid shadows, distortion, or reflections
- Use a plain white or neutral background
Step 2 — Separate Frames Into Individual Images
After scanning/photographing, you must create one file per frame.
- You can separate your frames using: Canvas, PowerPoint, or any basic image-editing tool
- Crop each frame cleanly
- Export each frame as its own PNG or JPEG
Step 3 — Correct Naming Protocol (Mandatory)
Each student must prepare and name their own images using the following format: Lastname-Image-#
- Files must be numbered sequentially
- Only your own last name should appear in your filenames
- Do not submit group-named files — each student submits their own set
Step 4 — ZIP Your Files
Once all your image files are ready and correctly named:
- Place all your images into one folder
- Name the folder using the format:
Lastname-FirstName-MixedMediaFrames - ZIP the folder
- Check that the ZIP file opens correctly and contains:
- Individual images
- Correct naming format
- No duplicates or missing files
Tutorials
📤 Submissions
| Type | File Name | Who Submits |
|---|---|---|
| Individual | Lastname-FirstName-MixedMediaFrames.zip |
Each student |
📄 Submit all 160 altered (and individually digitalized) frames with the correct naming protocol into a ZIP file.
⚠️ Use exact filenames. Incorrect submissions may result in lost points.